



Contents: Removal ↡ Installation and adjustment ↡
Removal
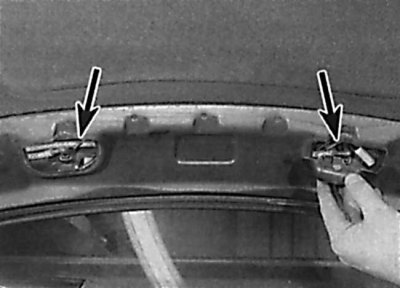
Location of plugs on the inside of the hood
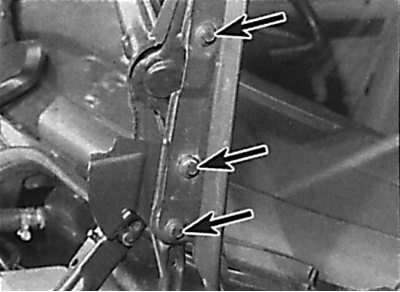
Location of the hinge bolts to the hood
1. Open the hood and place a clean rag under the corners of the hood to protect the vehicle's paintwork when removing the hood.
2. Carefully remove the plugs located in the center of the hood to access the washer hose and electrical connectors. Disconnect the washer supply hose from the check valve and the electrical connectors. Tie a thin, long cord to the hose and electrical connector. Pull the wiring and hose out of the hood and untie the cord from them, leaving it in the hood. Later, you will need the cord to pull the wiring and hose into the hood (see Fig. Location of plugs on the inside of the hood).
3. Using a marker, mark the position of the hinges on the hood (see Fig. Location of the hinge bolts to the hood).
4. Unscrew the bolts securing the left and right hood hinges and carefully remove the hood.
5. Check the bonnet hinges for play and wear and replace them if necessary. Please note that to replace the bonnet hinge you need to remove the front wing and it is advisable to have this work done at a service station.
Installation and adjustment
1. Using two assistants, install the hood and tighten the hood hinge mounting bolts by hand. Align the hood hinges according to the marks made earlier and tighten the mounting bolts.
2. Close the hood and check its position relative to adjacent surfaces. Adjust the hood position so that when the hood is closed, the gap around the hood perimeter is the same on all sides. To adjust, loosen the hood hinge mounting bolts and adjust the position by moving the hood. If this adjustment does not provide the required hood position, further adjustment can be made by loosening the mounting nuts and changing the position of the hood hinges. Access to the hood hinge mounting nuts is possible after removing the wing guard. To adjust the front part in height, screw in or unscrew the rubber cushions located on the front cross member.