
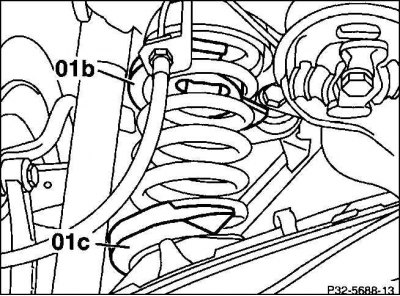
Attention! Depending on the equipment of the vehicle, various springs with corresponding rubber mounts are used. To identify the springs, the last coil is marked with a colored stroke, and the part number is also embossed. When changing, use springs with the same designation.
Removing
1. Place the car on stands at the rear.
2. If equipped, remove the suspension arm cover.
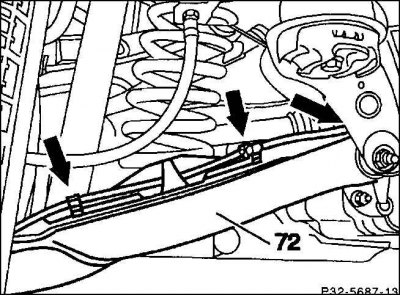
3. Remove the brake pad wear indicator wire from the mounts (72).
4. The spring is loaded. To remove it, it is necessary to compress it even more in order to unload the spring plates. In this case, the compression device should cover 4–5 turns.
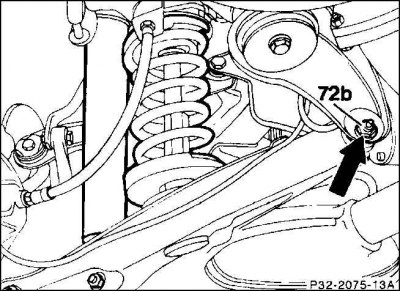
5. Loosen the self-locking suspension arm nut (72b), remove it together with the washer. Take out the bolt.
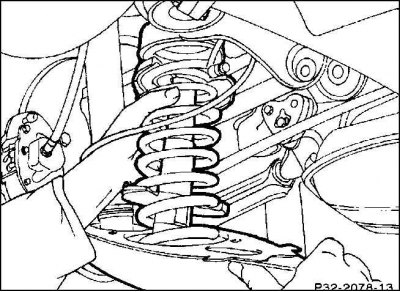
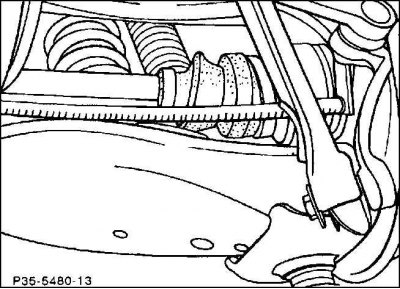
6. Pull the lever down and remove the spring along with the rubber mounts.
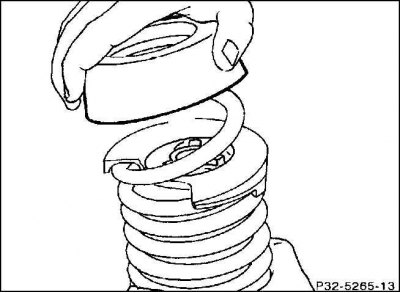
7. Compress the spring in the tool as shown in the figure, remove the rubber support by turning it to the left, then slowly decompress the spring.
Installation
1. Before installation, check the rubber bearings for porosity and damage and replace them if necessary. Clean the contact surface on the suspension arm.
2. Install the compression tool and slowly compress the spring.
3. Install the rubber support by turning it to the right. To facilitate installation, you can lubricate the support with liquid soap or glycerin.
4. Install the spring so that the end of the lower coil sits in the recess of the lever.
5. Install the suspension arm bolt and screw in a new self-locking nut (72b) with the washer without tightening it.
6. Place a garage jack under the suspension arm, raise the arm until the axle shaft is approximately horizontal. Don't forget the wood spacer between the lever and the jack.
Attention! When lifting, be careful not to lift the vehicle off the stands.
7. In this position, tighten the spring nut to 70 Nm.
8. Release the spring, paying attention to the correct fit in the lever and on the body.
9. Remove fixture and jack.
10. Reinstall the brake pad wear sensor wire.
11. If equipped, install the lever cover.
12. Check the vehicle level on the front axle.
13. Set the headlights to the correct position.