
2. To reduce fuel wastage, place a small container (capacity) under the filter housing and cover adjacent parts with a rag to absorb fuel.
3. Support the filter with your hand, then loosen and remove the banjo bolt from the top of the filter housing. Remove both o-rings and destroy them - new ones will be required during installation (see fig. 27.3).
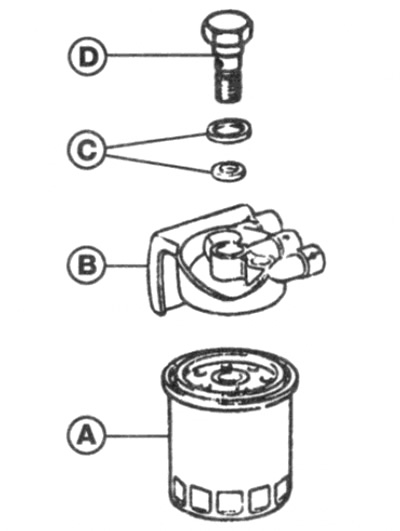
Pic. 27.3. Fuel filter parts
A Filter
The filter housing
With sealing washers
D Banjo Bolt
4. Remove the filter from the engine compartment, mating surface up, to reduce fuel spillage.
5. With the filter removed, check that the restriction hole in the fuel return line on the mating surface of the filter housing is clean and not clogged.
6. Take a new filter and lubricate the rubber seal with some clean fuel.
7. Move the filter to the housing, then insert a new bolt (using new sealing rings) and tighten securely.
8. The pre-filter is located to the left of the fuel injection pump. Unclip the fuel supply hose from the fuel tank in front of the pre-filter, then loosen the clamps and disconnect the fuel hoses from each side of the filter. Install the new assembly in place and tighten the hose clamps securely.
9. Reconnect the battery, then start the engine and let it idle. Check for fuel leaks.
Note: The fuel pump is self-priming, however it may take a few seconds to crank the crankshaft before the engine starts.
10. Increase the engine speed several times to 2000 rpm. minutes, then let the engine idle again. This should force air bubbles out of the filter, but if the engine idle is erratic, repeat the steps to clear the system completely.