



Sequence of works


1. For adjustment installation by length loosen the tightening torque of the bolts securing the hood to the hinges.
2. Move the hood to the desired side. To avoid scratching the painted surfaces, place a cloth under the corners of the hood on the windshield side.
3. Lateral adjustment is carried out by carefully bending the loops.
4. If this does not help, adjust the hood installation.
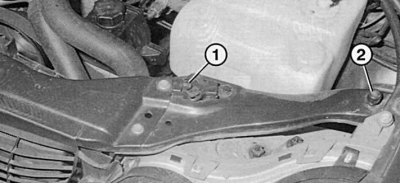
Fig. 11.3. The retainer (1) on the crossbar and the lock bracket on the hood must fit neatly into each other when closed. To adjust the hood height, rotate the bolts (2) securing the rubber buffers in the appropriate direction. Use a suitable plastic mass to check the gap (plasticine, putty)
5. For adjustment height settings turn or unscrew the rubber buffers 2 (Fig. 11.3) on the front cross member so that the edges of the hood are level with the upper edges of the wings.
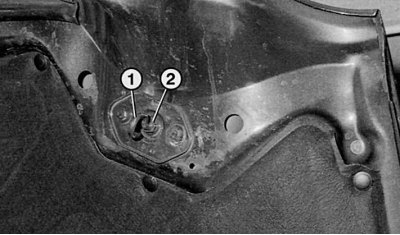
Fig. 11.4. To adjust the bracket (1) of the hood lock, loosen the tightening torque of the lock nut (2) and rotate the bracket in the desired direction
6. If the lock retainers do not fit neatly into the hood brackets or opening the hood is noticeably difficult, adjust the brackets by height. To do this, loosen the tightening torque of lock nut 2 (Fig. 11.4) and rotate the brackets in the desired direction, achieving the required setting.
[Original source of information mercedesman.ru]