
Attention! Before removing the radio, find out and write down its anti-theft code. Otherwise, the radio can only be switched on by a MERCEDES workshop or by the radio manufacturer.
Note. Since the middle of 2002, MERСEDES has not been equipping radios with security codes. the on-board electronics, after connecting the battery, automatically recognizes the radio.
Removing
1. Disconnect the negative cable (-) battery with the ignition off. The cabin air filter box must first be removed.
Attention! Before disconnecting the cable, find out the security code of the radio, if any, refer to Section Replacing the battery.
2. Remove the cover of the upper part of the center console, refer to the relevant section.
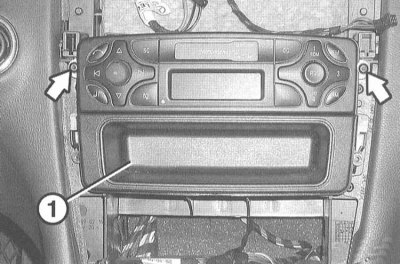
3. Remove 2 screws (arrows in the illustration).
4. Remove the radio receiver from the mounting hole.
Note. Pocket under the radio (1) in this case, it is removed together with the radio receiver.
5. Disconnect all connectors, as well as the antenna cable from the back of the radio. Remove the radio from the center console.
6. Connecting with fiber optic cable: Carefully unplug the fiber optic cable connector on the back of the radio.
Attention! Do not bend, pull, or crush the fiber optic cable. Fiber optic cable transitions must not be soiled or scraped. Protect contact points with caps and plugs.
Installation
1. Mate the radio connector or connect the fiber optic cable.
2. Insert the pocket into the mounting hole.
3. Carefully insert the radio into the mounting hole and secure to the center console.
4. Install the center console cover, refer to the relevant section.
5. Connect ground cable (-) battery with the ignition off. Install the cabin air filter box. If necessary, enter the radio code and set the time on the clock.
Navigation device with screen
Removing
1. Disconnect the negative cable (-) battery with the ignition off. The cabin air filter box must first be removed.
Attention! Before disconnecting the cable, find out the security code of the radio, if any, refer to Section Replacing the battery.
2. Remove the cover of the upper part of the center console, refer to the relevant section.
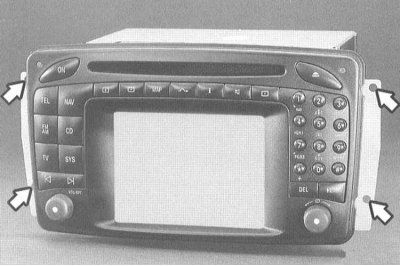
3. Remove 4 screws (arrows in the illustration).
4. Remove the navigation device from the mounting opening.
5. Disconnect all connectors, as well as the antenna cable from the back of the radio. Remove the radio from the center console.
6. Connecting with fiber optic cable: Carefully unplug the fiber optic cable connector on the back of the radio.
Attention! Do not kink, stretch or crush. Fiber optic cable transitions must not be soiled or scraped. Protect contact points with caps and plugs.
Installation
1. Installation is carried out in the reverse order of removal.
2. Connect ground cable (-) battery with the ignition off. Install the cabin air filter box. If necessary, enter the radio code and set the time on the clock.