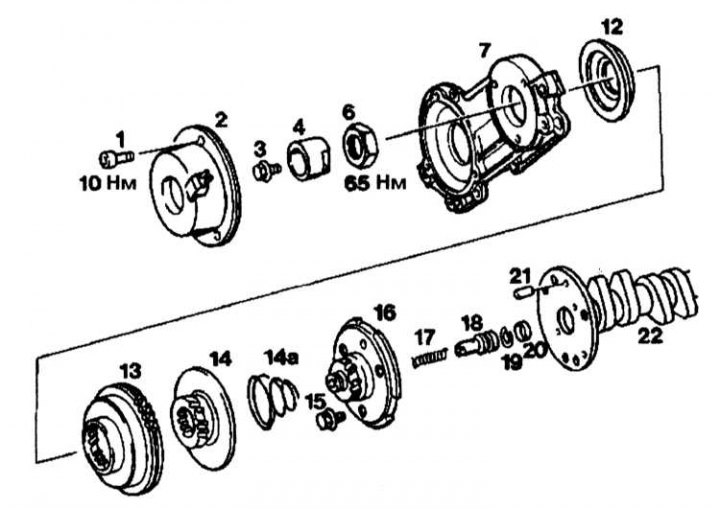
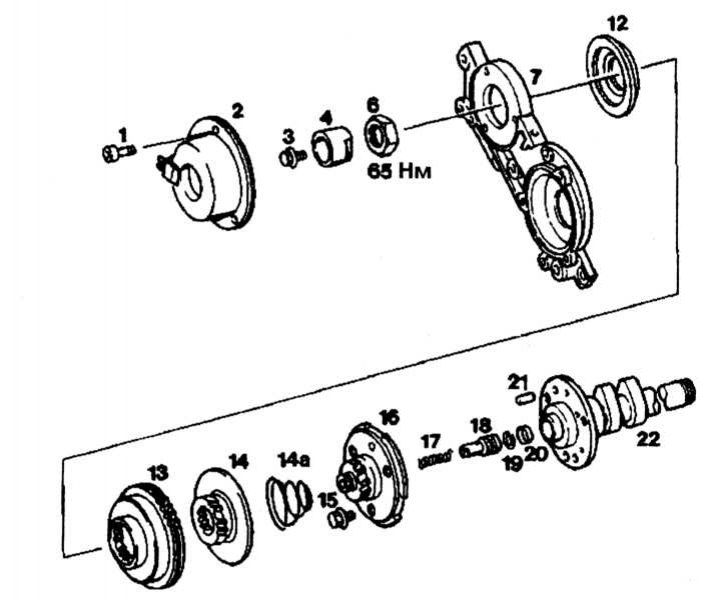
Valve timing regulator
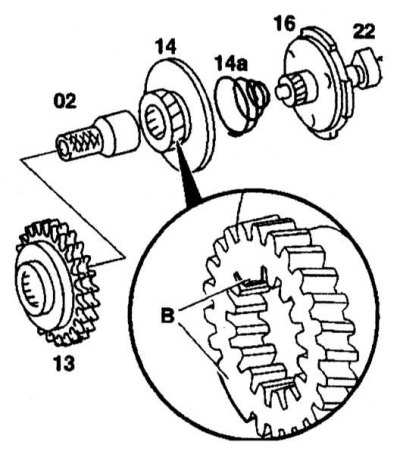
1, 3, 15 - Bolts; 2, 7, 12 - Covers; 4 - Fittings; 6 - Nut; 13 - Right sprocket; 14 - Adjusting piston; 14a - Conical spring; 16 - Flange; 17 - Spring; 19 - Retaining ring; 20 - Bushing; 21 - Finger; 22 - Camshaft
Removing the left camshaft sprocket
6 - Nut; 12 - Cover; 13 - Asterisk; 14 - Adjusting piston; 14a - Conical coil spring
Removing
1. Remove the front covers of both regulators. 2. Set the piston of the first cylinder to the position 45°before TDC.
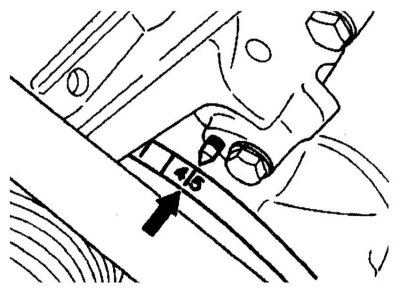
3. Block the camshafts with the rods (1).
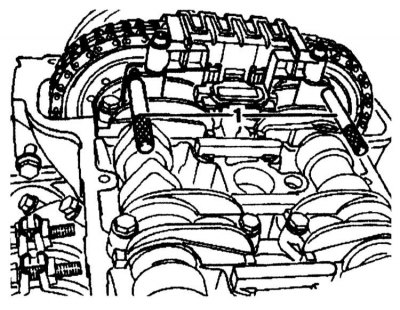
4. Mark the location of the timing chain in relation to the camshaft sprockets.
5. Remove the timing chain tensioner.
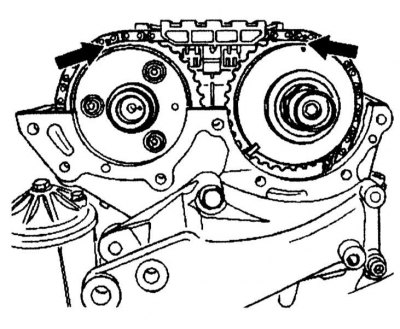
6. Remove the upper guide arms. Remove only the right arm for the right adjuster.
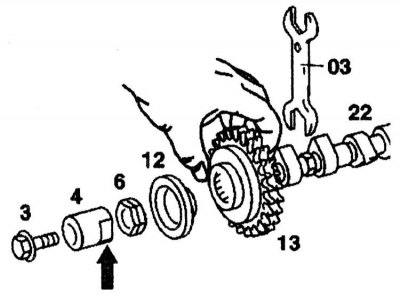
7. Remove the right exhaust camshaft sprocket. 8. Remove the bolt (3) fittings (4).
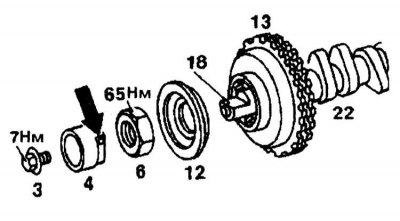
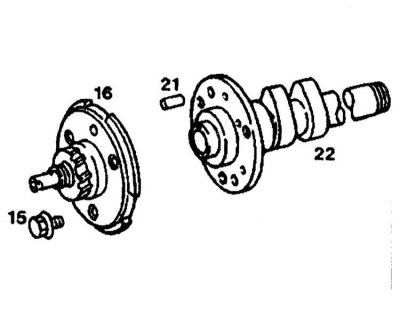
9. Loosen the nut (6), remove the cover (12), left camshaft sprocket (13) with adjusting piston (14) and conical spring (14a). Turn away bolts (15) and remove the flange from the intake camshaft.
Installation
1. Screw the flange (16) to the intake camshaft (22).Check that the guide pins are correctly installed (21). Replace bolts (15).
2. Insert the spherical spring (14a) and install the adjusting piston (14) on the flange (16) to a fixed position (locking tooth B).
3. Set the intake camshaft sprocket to a fixed position (locking tooth B) on the slots of the adjusting piston (14); raise the timing chain to carry this procedure up.
4. Loosen the stop nut. Hold the regulator assembly for this operation.
5. Install the cover (12).
6. Tighten the nut (6). Hold the camshaft (22) with a key (03).
7. Install fittings (4) to a fixed position.