



Install a dial indicator on the cylinder head as shown in Fig. 95. Press the camshaft to one side of the housing and set the indicator scale to "0".
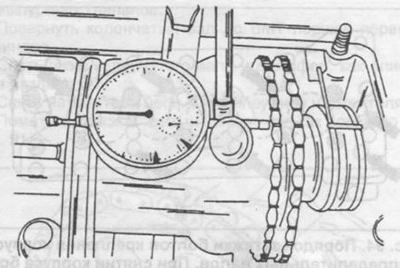
Fig. 95. Checking the axial clearance of the camshafts.
Move the shaft to the other side and record the indicator readings.
If the axial clearance exceeds the required value, replace the shaft sleeve.
To remove the shafts, you must do the following:
Unscrew the two rear covers from the camshaft housing.
While holding the left shaft from turning, loosen the sprocket mounting bolt.
Move the camshaft back and remove the sprocket.
Remove the camshafts back from the housing.
Lubricate the bearing journals of the shafts with engine oil and install them into the housing.
When installing the intake camshaft as shown in fig. 59, the sprocket (6) with the spacer ring (5) is put on the shaft. Then lubricate the bushing (3) and put it in the bearing. Tighten the fastening bolt (3) with washers (2). The fastening bolts and disc washers can be used once. Holding the shaft from turning, tighten the sprocket fastening bolt to a torque of 80 Nm.
When installing the exhaust camshaft, seat the shaft on the lubricated housing bearings as shown in fig. 60. The sprocket is mounted after the shaft is installed in the housing.
Install the two rear covers with gaskets. Install the camshaft housing onto the cylinder head.