



Contents: 4-cylinder engine ↡ 6-cylinder engine ↡
4-cylinder engine
Removal
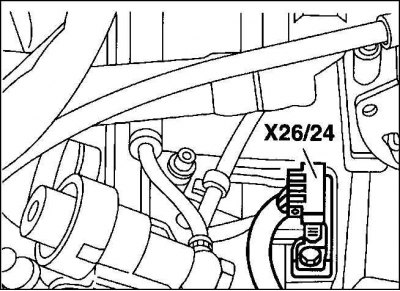
1. Disconnect the plug connection between the engine and the ignition coils (X26/24).
2. Remove and set aside the windshield washer reservoir.
3. Unscrew the intake manifold bracket.
4. If equipped, disengage the cruise control lever.
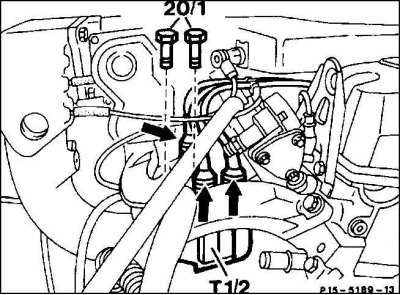
5. Remove the high-voltage wires (arrow) from the ignition coils. Unscrew the bolts (20/1) to the ignition coils.
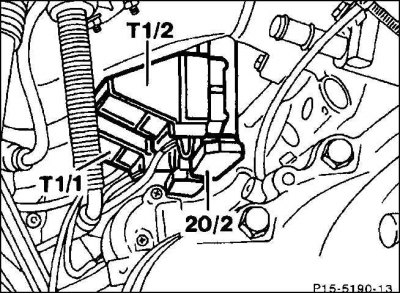
6. Open the protective caps (20/2) on the underside of the ignition coils. Mark the wires on terminals 15 and 1 with adhesive tape and unscrew them.
7. Pull out the ignition coils (T1/1) and (T1/2).
Attention! The connecting elements are under voltage up to 400 volts. Therefore, it is always necessary to connect the clamps/core pack to the car body.
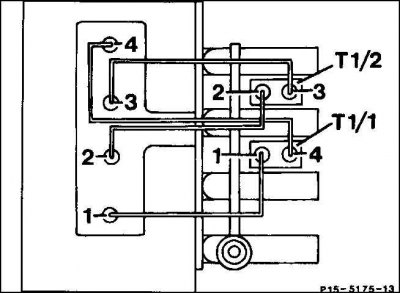
8. Install the ignition coils in the reverse order of removal. Accordingly, one ignition coil supplies voltage to two spark plugs.
6-cylinder engine
Removal
1. Remove the air cleaner cross pipe by loosening the hose clamps.
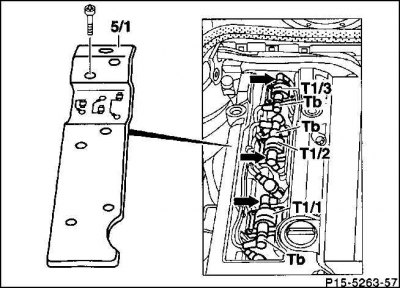
2. Unscrew the spark plug protective cover (5/1).
3. Remove the control circuit wire plugs on the ignition coils (arrows).
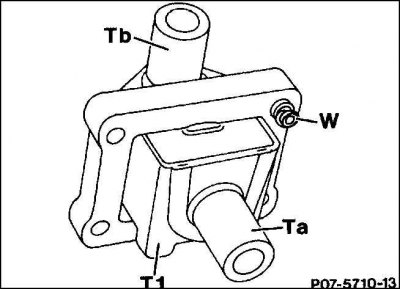
4. Remove the high voltage wire plugs from the secondary circuit output (Tb).
Attention! The ignition coils (T1) are mounted via the spark plug connector via (Ta) directly onto the spark plug. The output of the secondary circuit (Tb) is fed to the corresponding spark plug via a high-voltage wire. The guide pin (W) is also the element connecting the ignition coil to the housing.
5. Pull up the ignition coil.
Caution! The primary circuit connections are under voltage up to 400 volts! Therefore, the clamp/core pack must always be connected to the vehicle body.
Installation
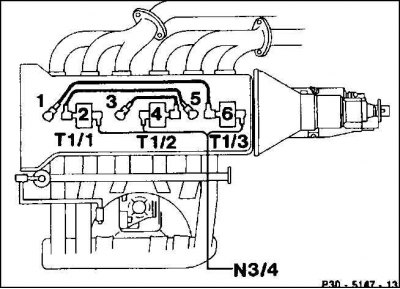
Installation is performed in the reverse order of removal. The diagram shows the connection diagram of the ignition coils and spark plugs. Accordingly, one ignition coil supplies high voltage to two spark plugs.
Read more on the website: www.mercedesman.ru