



Gasoline engine
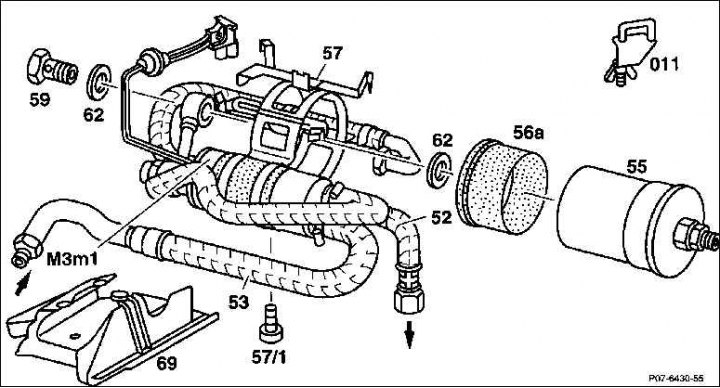
Removal
Warning! Be sure to pay attention to good ventilation of the workplace. Fuel vapors are toxic, avoid using open fire due to the risk of fire!
The fuel filter, when viewed in the direction of travel, is located on the bottom of the vehicle, to the right, in front of the rear axle.
1. Disconnect the ground (–) cable from the battery terminal.
Attention! This will erase the radio's anti-theft code.
2. Reduce the fuel vapor pressure by briefly opening the fuel filler cap.
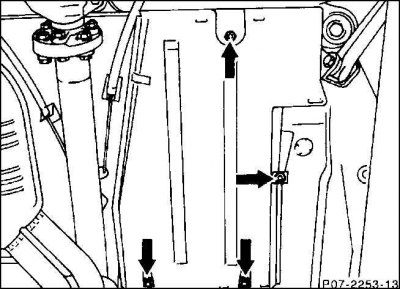
3. Remove the protective cover (69), having previously marked its mounting position.
4. Disconnect the inlet (53) and pressure (52) pipes from the clamps with standard hose clamps (011). To facilitate assembly, mark the hoses with adhesive tape. 5. Unscrew the hollow bolt (59) on the fuel filter. Wipe off any spilled fuel with a rag.
6. Unscrew the fuel pressure line on the filter.
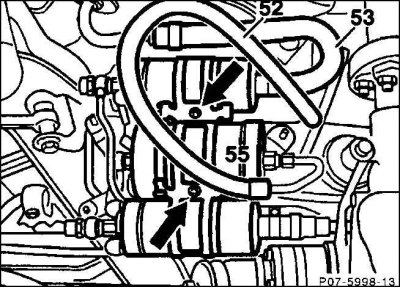
7. Loosen the bolts (arrows) on the holder and remove the fuel filter (55).
Installation
1. Check the plastic sleeve (56a) or plastic film (56) for damage and replace if necessary.
2. Install the fuel filter together with the plastic sleeve or film. The plastic sleeve must be installed between the fuel pump and the holder. Make sure that it protrudes on both sides of the holder. Otherwise, contact corrosion of the metals may occur when the fuel filter comes into direct contact with the holder. Secure the fuel filter to the holder with bolts (57/1), (57/3).
3. Screw on the fuel hoses. Insert the hollow bolt with a new copper sealing ring and tighten to 25 N·m.
4. Remove the hose clamps.
5. Install the protective cover (69).
Original can be found on the website: MercedesMan.ru
6. Connect the ground (–) cable to the battery.
7. Start the engine and, with the engine running, check the connection points for leaks.
8. Set the time on the clock.
9. Enter the radio anti-theft code.