
Warning: Brake fluid is poisonous: if fluid comes into contact with skin, wash it off immediately and thoroughly: if fluid enters the stomach or eyes, seek immediate medical attention. Some types of hydraulic fluid are flammable and may ignite on contact with hot parts; when servicing a hydraulic system, it is best to treat any fluid as flammable and take appropriate precautions as if it were gasoline. Brake fluid has a discoloring effect, especially on plastics, and should be washed off with plenty of clean water if spilled. In conclusion, it should be taken into account that the liquid is hygroscopic (it absorbs moisture from the air). The old fluid may be contaminated and unsuitable for further use. When topping up or changing fluid, always use the recommended type of fluid, and make sure that the fluid is fresh and stored in a well stoppered container.
Removing
1. Apply the parking brake, then jack up the front of the vehicle and support it on jack stands (see "Vehicle lifting and jacking up").
2. Working from the right side of the vehicle, position a container under the slave cylinder, then unscrew the hydraulic tube fitting from the rear of the cylinder. If desired, you can detach the flexible hose from the metal tube. When fluid is drained, plug open ends of tubes/hoses and slave cylinder.
3. Unscrew the two screws securing the working cylinder to the bell-shaped gearbox housing, then remove the cylinder together with the pusher (see fig. 4.3). Remove the adjusting washer.
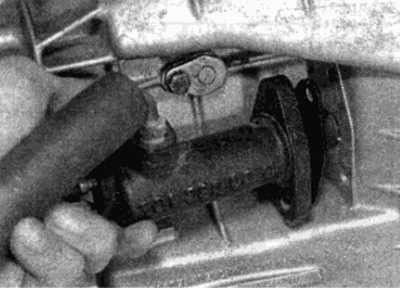
Pic. 4.3. Removing the clutch slave cylinder from the gearbox bell housing
Disassembly
4. Using a screwdriver, carefully pry off the fastening ring and remove the pusher.
5. Tap the cylinder against a block of wood to extend the piston, then remove the piston and spring (see fig. 4.5, a, b).
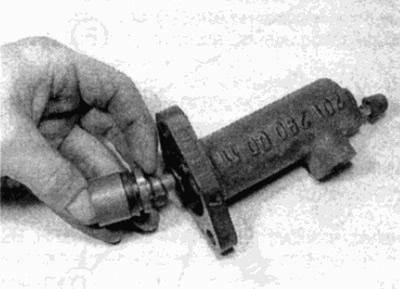
Pic. 4.5, a. Remove the slave cylinder...
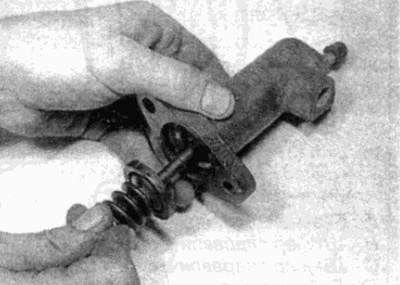
Pic. 4.5b....behind him a spring
6. Flush all parts in clean hydraulic fluid, then position them for inspection (see fig. 4.6).
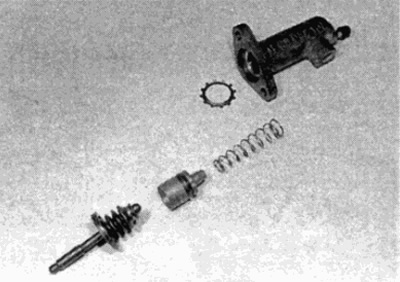
Pic. 4.6. Clutch Slave Cylinder Parts
7. Check up an internal surface of the cylinder and the piston. If scoring or sagging is found, replace the cylinder assembly. If the condition of the cylinder is normal, a repair kit consisting of new rubber seals should be purchased. Never use old seals.
8. Remove the old seal from the piston and install the new seal using only your fingers. To facilitate installation of the gasket, lubricate it with clean hydraulic fluid. Make sure. that the sealing lip faces the piston spring.
9. Lubricate the inside of the cylinder and insert the spring, with large coils towards the fitting on the cylinder.
10. Carefully insert the piston, aligning the protruding end with the center of the spring.
11. If necessary, install a new dust seal on the lifter, then insert the lifter into the cylinder. The end of the pusher with the dust cover must point towards the piston.
12. Press the new retaining ring into place and push it to secure the pusher.
Installation
13. Begin installation with the shim grooved side facing the bell housing.
14. Attach the cylinder and pushrod to the body, making sure that the pushrod is aligned with the spherical recesses in the clutch release lever.
15. Install and tighten the mounting bolts.
16. Connect the tube and hose, then bleed the hydraulic system as described in paragraph 6.