



Contents: Disassembly ↡ Assembly ↡
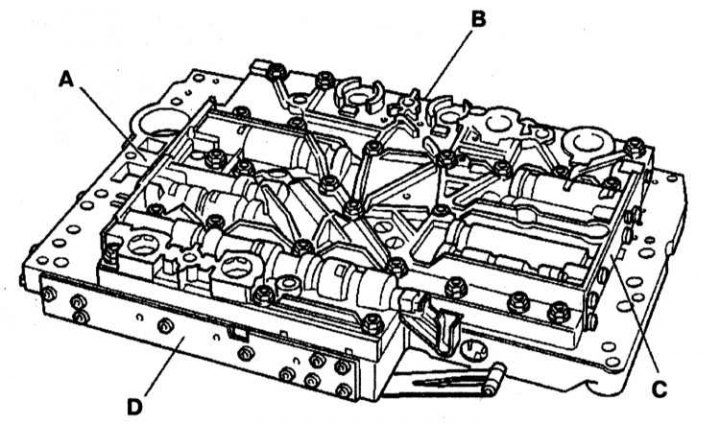
A — Working pressure adjustment valve. Lubrication pressure adjustment valve. 2-3 gear overlap adjustment valve
B — 1-2/4-5 gear shift unit. Gear shift pressure adjustment valve
C — 3-4 gear engagement unit
D — 2-3 gear engagement unit. Adjusting valve locking clutch. Adjusting valve B2
Disassembling the gear shift plate
Article borrowed from the web portal: mercedesman.ru
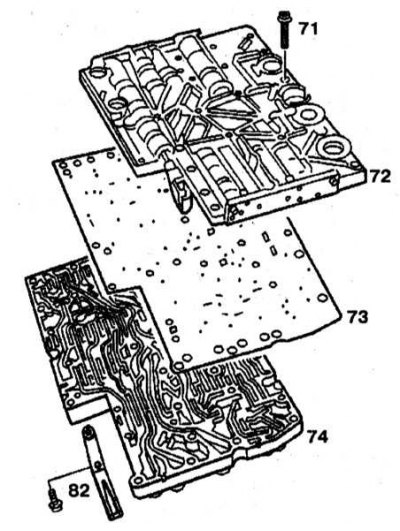
71 - Bolts; 72 - Valve body cover; 73 - Sealing plate; 74 - Valve body; 82 - Retainer
Disassembling the gear shift plate
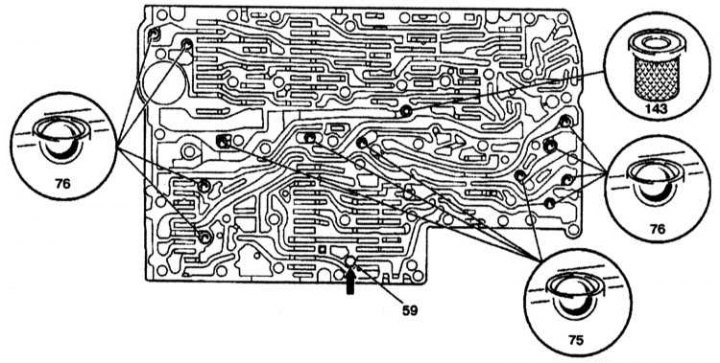
59 - Guide pin; 75 - Plastic Ball Valves; 76 - Steel Ball Valves; 143 - Central lock
Disassembling the gear shift plate
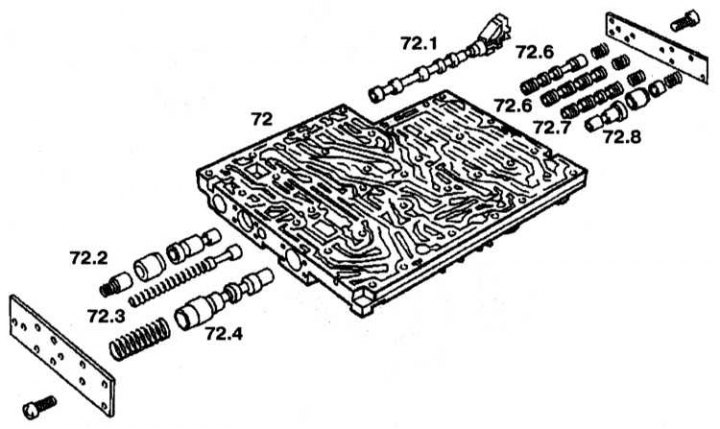
72 - Valve body; 72.1 - Gear selector valve; 72.2 - 2-3 gear overlap adjustment valve with sleeve and piston; 72.3 - Lubrication pressure control valve; 72.4 - Working pressure regulation valve; 72.5 - 3-4 gear engagement locking valve; 72.6 - 3-4 gear shift control valve; 72.7 - 3-4 gear pressure switching valve; 72.8 - 3-4 shut-off control valve
Disassembling the gear shift plate
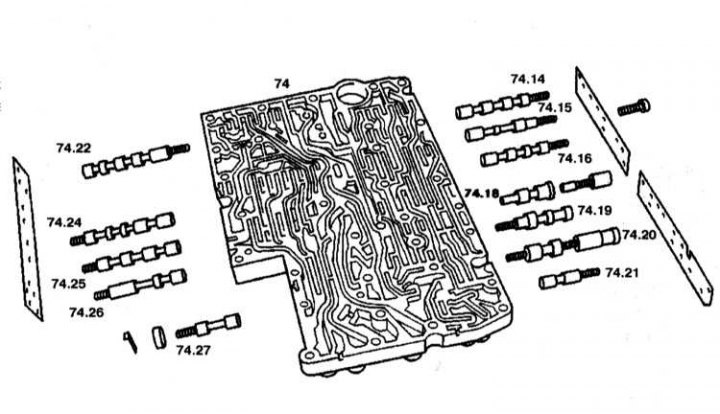
74 - Valve body; 74.14 - 1-2/4-5 gear shift control valve; 74.15 - 1-2/4-5 gear engagement locking valve; 74.18 - 1-2/4-5 gear overlap adjustment valve with sleeve and piston; 74.19 - Gearshift Pressure Regulating Valve; 74.20 - Pressure regulating valve control valve; 74.21 - Changeover valve pressure control valve; 74.22 - Torque converter lock-up adjustment valve; 74.24 - Pressure switching valve when engaging 3-4 gears; 74.25 - 2-3 gear engagement control valve; 74.26 - 2-3 gear engagement locking valve; 74.27 - Switching valve B2
The gear shift plate is shown in the illustration.
Disassembly
1. Unscrew the fasteners 82.
2. Unscrew bolts 71.
3. Remove valve body cover 72 from valve body 74.
4. Remove the sealing plate 73. All 12 balls are located in the valve body, four 75 of which are plastic, the remaining 8 76 are steel.
5. Unscrew the valve body covers. The bushings and pistons of the adjusting valves 72.2, 72.8 and 74.18 must not be mixed. The switching valve B2 can be removed and installed when the valve body cover is removed.
Assembly
Assembly is carried out in the reverse order of disassembly. Insert guide pin 59 into the valve body (arrow).