



Kinematic diagram of automatic transmission
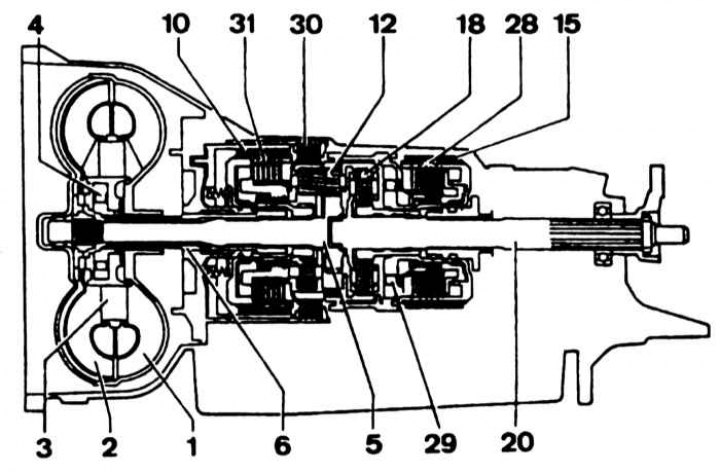
1 - hydraulic transformer pump wheel; 2 - turbine wheel of the torque converter; 3 - torque converter stator; 4 - freewheel clutch of the torque converter; 5 - primary shaft; 6 - stator shaft; 10 - Band brake B1; 12 - planetary gear; 15 - B2 band brake; 18 - rear planetary gear; 20 - output shaft; 28 - Clutch K2; 29 - freewheel clutch F1; 30 - multi-disc brake VZ; 31 - Clutch K1
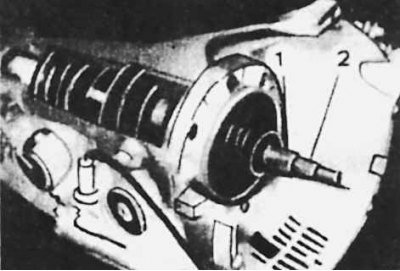
Gearbox input shaft
1 — front pump shaft
2 — transformer turbine shaft
To remove and install the transformer, it is necessary to remove the gearbox and drain the oil from it.
Removal
1. Place the gearbox in a vertical position on the stand and remove the gear selection rod.
2. Insert the key through the transformer ventilation grille on the gearbox housing and remove the transformer plastic locking pin by turning it to the left by 1/4 turn.
3. Install handles 126 589 01 62 00 on the transformer and remove it.
Checking the technical condition
1. If the gearbox oil is burnt or contains seal particles, flush the transformer and the water-oil radiator and heat exchanger pipes.
2. If metal shavings are found in the gearbox oil pan, replace the transformer, since flushing cannot completely remove the shavings, which may cause the gearbox to fail.
Installation
1. Lubricate the drive flange.
2. Carefully insert the transformer into the housing, turning it alternately left and right to ensure proper engagement of the gear rims.
3. Remove handles 126 589 01 62 00.
4. Place the transformer lock pin and turn it to the right 1/4 turn to lock the transformer.
5. The installation of the transformer is now complete and before installing the gearbox on the car it needs to be placed in the correct position.
6. To do this, turn the transformer so that one of the plates with threaded holes on its mating surface is at the bottom.
7. Apply a thin layer of grease to the centering journal of the converter and connect the gear selector rod before connecting the gearbox to the engine.