
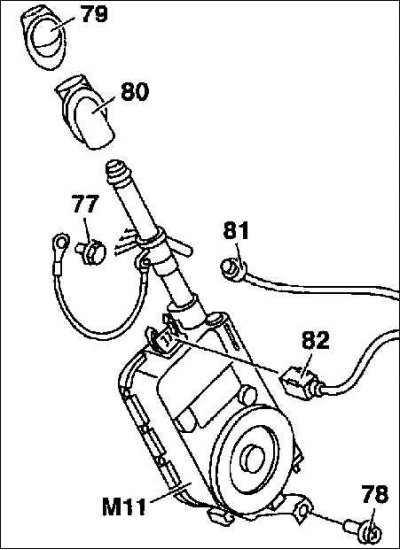
77, 78. Bolts; 79. Top seal; 80. Bottom seal; 81. High frequency wire; 82. Electrical connector; M11. Automatic antenna
Removing
1. Disconnect the ground wire from the battery terminal (–).
Attention! This erases the anti-theft code of the radio. See recommendations before disconnecting wires subsection 13.1.7.
2. Open the trunk lid, release the spring clips and remove the side trim.
3. Unscrew the wire to connect to the housing together with the bolt (77).
4. Unscrew the antenna at the bottom of the holder (78) and Remove it from the bottom of the rubber bushing in the fender. Disconnect the antenna wire from the terminals (81) and, if present, a control line (82).
Installation
1. Check the rubber bushing in the fender for porosity or damage, replace if necessary.
2. Insert the antenna from below and insert its spherical head into the bottom of the sleeve.
3. Push on the upper part of the sleeve and fix it in the lower part.
4. Screw the antenna to the holder.
5. Screw the wire to the body to connect the antenna to the car body.
6. Attach the antenna wire to the terminal. If there is a remote control antenna, connect the electrical control line to the terminal.
7. Fit and secure the side trim with spring clips.
8. Connect the ground wire to the battery terminal (–). Set the time on the clock and program the anti-theft code for the radio.