

Differential with automatic lock
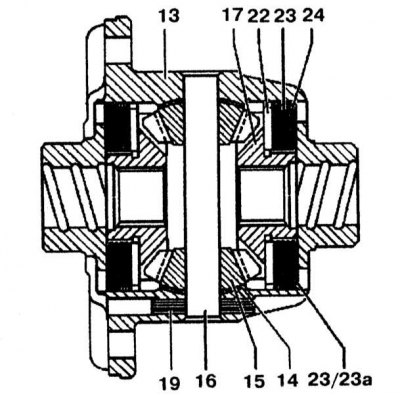
A - Friction disc block with driven gear with a diameter of 185 mm
B - Block of friction discs with a driven gear with a diameter of 210 mm
Disassembly
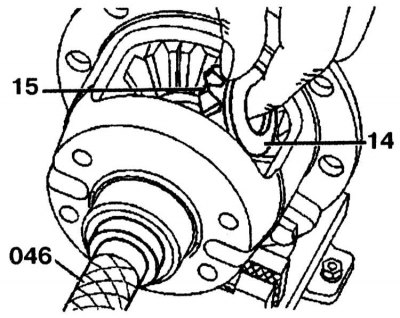
Using a punch, remove the roller pin (19) and differential pin (16) from the differential housing (13)
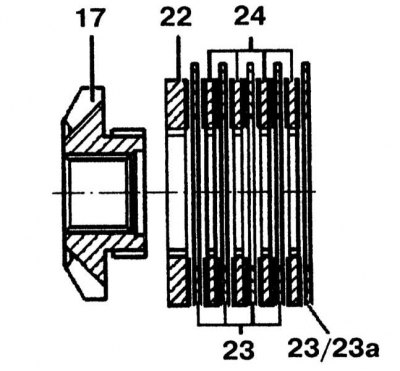
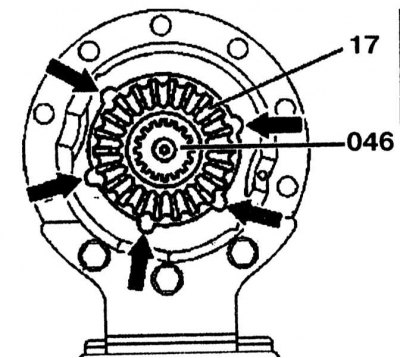
14 - Spherical washer; 15 - Satellites; 17 - Gears for driving drive shafts; 22 - Friction disc with lining on one side; 23, 23a - Friction discs without pads; 24 - Friction discs with pads on both sides
1. Fix the differential housing (13).
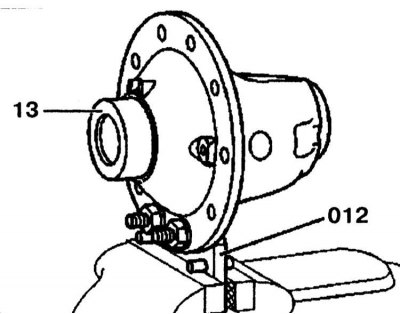
2. Remove roller pin (19) and differential pin (16) using a drift from the differential housing (13).
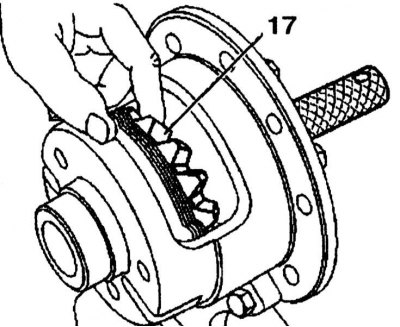
3. Install drifts (046) in the drive gears of the drive shafts (17).

4. Turn the satellites (15) with spherical washers (14) towards the hole and remove them.

5. First, remove the right drive gear of the drive shaft (17) (shown in installed position) with friction discs.
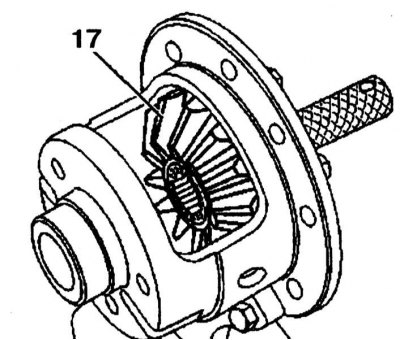
6. Remove the left drive shaft gear (17) (driven gear side) with friction discs.
Assembly
Mount the friction discs in the correct order on both drive gears of the drive shafts (17)
17 - Drive shaft drive gear; 22 - Friction disc with lining on one side; 23, 23a - Friction discs without pads; 24 - Friction discs with pads on both sides
1. Install the friction discs in the correct order on both drive gears of the drive shafts (17) and thoroughly lubricate the friction discs (22) And (24) universal hypoid transmission fluid. 2. First install the left drive gear of the drive shaft (driven gear side) with friction discs, then install the right drive gear of the drive shaft (17) with friction discs and install a punch (046) paying attention to the fact that friction discs without linings have lugs.
 |  |
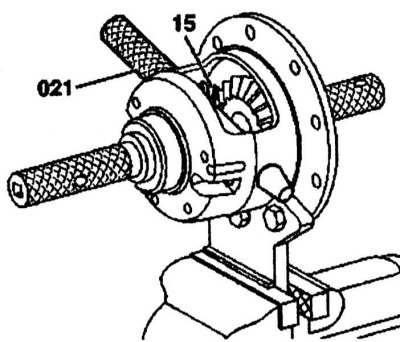
3. Install satellites (15) with spherical washers (14), using a punch (046), screw them in until they are seated in the differential case.
4. Install the differential pin with a drift into the satellites and spherical washers.
5. Check the friction torque of the differential. It should be 80-160 Nm.
6. Install differential pin (16) and roller finger (19).

7. Remove the differential from the vise.