
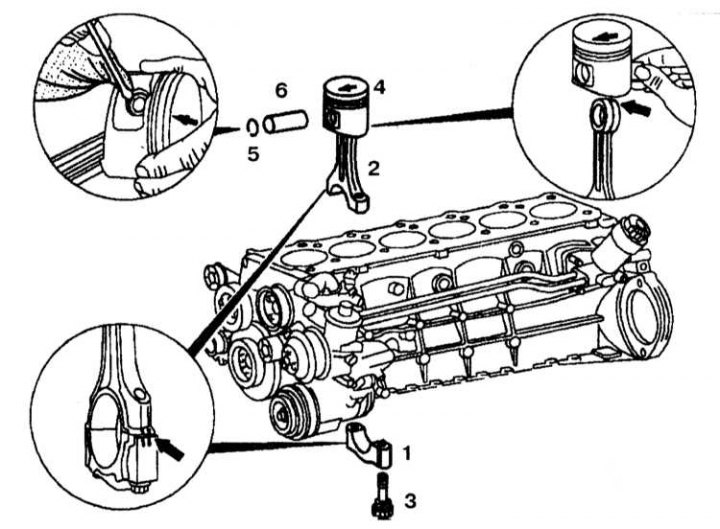
Removing the piston with connecting rod
1 - Connecting rod cover; 2 - Connecting rod; 3 - Bolt; 4 - Piston; 5 - Retaining ring; 6 - Connecting rod pin
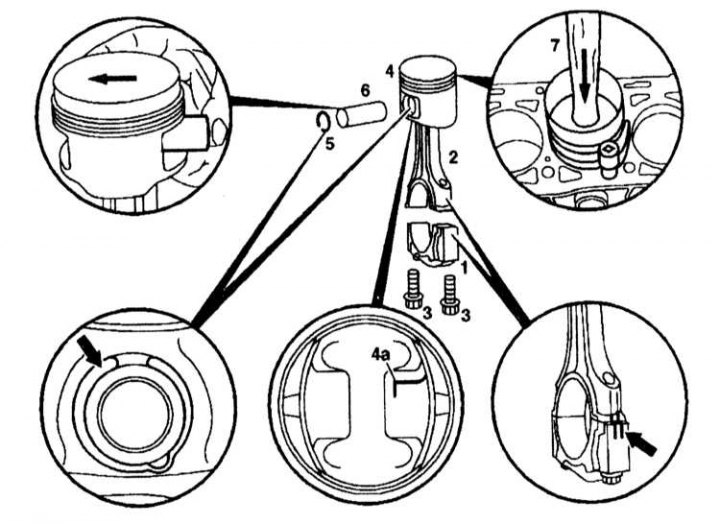
Pistons installation
1 - Connecting rod cover; 2 - Connecting rod; 3 - Bolt; 4 - Piston; 5 - Retaining ring; 6 - Connecting rod; 7 - Mandrel
1. Roll up the connecting rod bearing caps (1). connecting rod (2) and cover (1) labeled together.
2. Remove the piston (4) and connecting rod (2) up. The direction of travel is stamped on the top of the piston. On some versions, the direction arrow does not remain visible for long due to piston wear; in this case the direction must be marked again.
3. Use a screwdriver to press out the retaining ring (5) and remove the piston from the connecting rod.
4. Check up backlashes of piston rings.
5. Lubricate the piston pin (6) and connecting rod bushing.
6. Install the piston (4) on the connecting rod (2).
7. Press in the piston pin by hand (6).
8. Insert retaining ring (5) into a groove in the piston.
9. Wipe cylinders, connecting rod journals, liners and pistons (4) oil.
10. Install the mandrel (7) on the piston rings.
11. Install pistons (4) in the direction of travel.
12. Install the cranks (2) and lids (1), by aligning the side marks.
13. Check up and tighten bolts of fastening of rod necks.
14. After assembly, check clearances and ease of rotation.