



Contents: Removal ↡ Installation ↡
Removal
Loosen the wheel bolts.
Jack up and support the rear.
Remove the rear wheel.
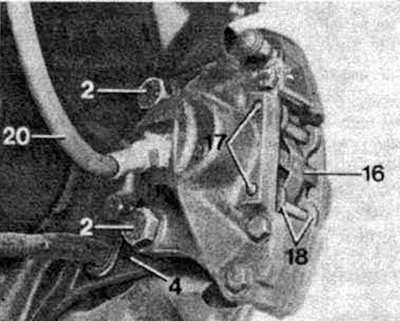
16. Retaining spring. 17. Pins. 18. Brake pads. 20. Brake hose.
Loosen the fixing bolts (2) and remove the caliper (2) from the diagonal arm (4).
Remove the brake disc (12) from the axle flange (15). The illustration also shows the mounting pin (14).
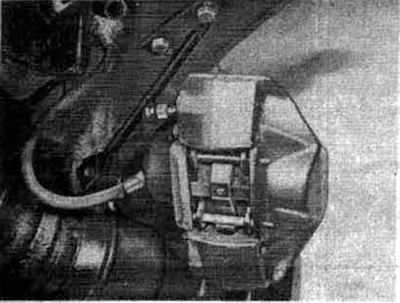
Hang the caliper on the stabilizer in such a way as not to twist or bend the brake hose.
Note: Do not disconnect the brake hose, otherwise the brake system will have to be bled.
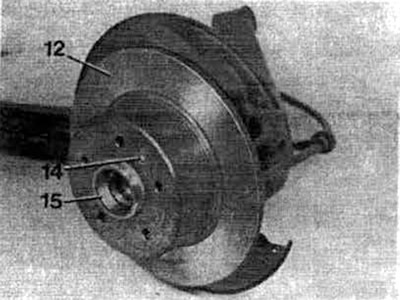
Remove the brake disc (12) from the axle shaft flange (15). The illustration also shows the mounting pin (14).
Caution: The parking brake must be released. A stuck brake disc can be released by tapping it lightly with a rubber mallet.
Installation
In order for both wheels to brake equally, both discs must have the same, both discs must have the same degree of surface treatment. Therefore, you should always replace discs in pairs (on both wheels).
Remove rust from the disc flange and rear axle shaft.
Note: In order to facilitate subsequent removal of the brake disc, lubricate the flange of the rear axle shaft at the location of the pins with high-temperature paste (for example, Molykote-U or G-Rapid, LiqubMoly LM-36 or LM-508 SC).
Wipe new discs with solvent to remove the protective coating.
Secure the new disc to the rear axle flange using the mounting pin. Install the caliper onto the trailing arm, checking that the brake hose is not pinched.
Tighten the new self-locking screws.
Note: If the screws are not tightened properly, it is necessary to process the threaded holes in the diagonal lever with an M12x1.5 tap.
Replace the wheel, lower the vehicle and tighten the wheel bolts in a diagonal sequence.
Caution: After finishing the work, press the brake pedal hard several times to allow the new disc to rub against the brake pads.
Check the fluid level in the brake reservoir.