



Contents: Removal ↡ Installation ↡
Removal
Disconnect the ground cable from the battery.
Pull out the green wire plug on the distributor, having first disconnected the retaining bar.
Remove the distributor cap by loosening the 2 retaining hooks. Insert a screwdriver into the cross-shaped slot of the hook, press down and turn to the left by 90" (quarter turn). The hook will come off the mounting lug attached to the side of the distributor.
Disconnect the vacuum supply from the pipe.
Set the engine to the TDC position of the 1st cylinder. To do this, set the gearbox to neutral and turn the engine with a wrench by the central nut of the crankshaft pulley in the direction of rotation (clockwise) until the marking on the contact tongue of the distributor rotor coincides with the mark on the edge of the distributor housing; if present, slide the dust cover back.
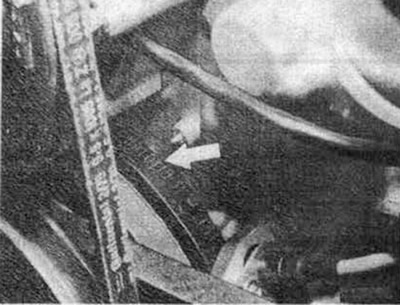
At the same time, the pointer on the block body should be opposite the TDC mark on the crankshaft pulley (see arrow).
Caution: Do not turn the motor in the opposite direction.
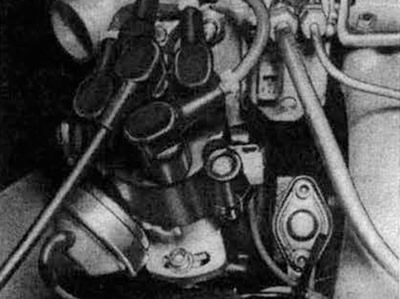
Loosen the distributor mounting bolt using an Allen key and remove the distributor.
Caution: Do not turn the engine any further with the distributor removed.
Installation
Before installation, check whether the engine is still in the TDC position of the first cylinder. A Turn the distributor shaft so that the markings on the distributor rotor and the distributor housing match.
Insert the distributor so that the longitudinal hole on the base of the distributor is approximately in the middle near the hole for the fixing bolt.
Tighten the mounting bolt without overtightening.
Set the ignition timing temporarily. To do this, connect the stroboscope according to its operating instructions. Have the assistant turn the engine with the starter and illuminate the ignition timing marking on the engine block with the stroboscope.
The ignition timing is set correctly when the setting value on the crankshaft pulley is stationary opposite the pointer on the engine block and the ignition timing table.
If the required value is not achieved, loosen the distributor mounting bolt and turn the distributor until the markings match.
Tighten the distributor mounting bolt. f Tighten the vacuum supply.
Check the location of the dust cover, the nose of the cover should fit into the groove on the edge of the distributor housing.
Check the vertical seating position of the retaining plate on the distributor housing; if necessary, align and tighten the bolt.
Insert the distributor cap so that the wire for the first cylinder is opposite the notch on the edge of the distributor. The notch is only visible when the dust cover is slightly moved. On top of the distributor cap, next to the corresponding connection point of the high-voltage wire, there is a designation "1" in a circle.
Check the correct seating position of the distributor cap by turning it right and left; the cover should not turn. Press down the 2 side locking hooks, aim with the rotation at the locking plate on the side of the distributor housing and release.
Check that the hooks are properly engaged and that the distributor cap is securely seated on the distributor.
Insert the green wire into the distributor and secure with a plate.
Connect the negative cable to the battery.
Start the engine and warm it up.
Set the ignition timing on a running engine and check the angle of the closed state of the contacts.