
Front axle

Installation details of the front axle differential assembly
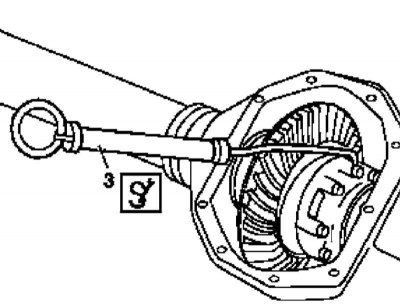
1 - Cover; 2 - Mounting brackets; 3 - Assembling the differential with the driven gear of the final drive
Checking the resistance value of tapered bearings to rotation
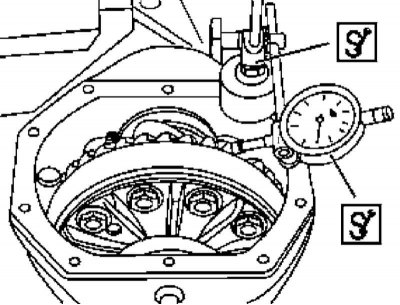
Checking the backlash of the gears of the final drive
1. Drain the oil from the axle housing (see Section Checking and adjusting the level / changing the oil in axle assemblies).
2. Loosen and remove the cover (1).
3. Remove the assemblies of both drive shafts with hinged casings (see Section Removal and installation of drive shafts of the forward bridge).
4. Pre-labeled (complete with shims and outer races), remove the mounting brackets (2).
5. With a special tool (460 589 05 31 00) open the gearbox housing and remove the differential assembly from it with the driven gear of the final drive (3).
6. Thoroughly wipe the removed components, defective
7. Installation is carried out in the reverse order.
Note. When installing the cover (1) do not use any sealants. Do not forget to check the conclusion of the resistance of the bearings to turning and the engagement play of the final drive gears (see illustrations above). Also evaluate the characteristics of the contact patches (see Section Checking the correct engagement of the final drive gears). Make sure the crankcase drain plug is tightened to the correct torque.
Rear axle
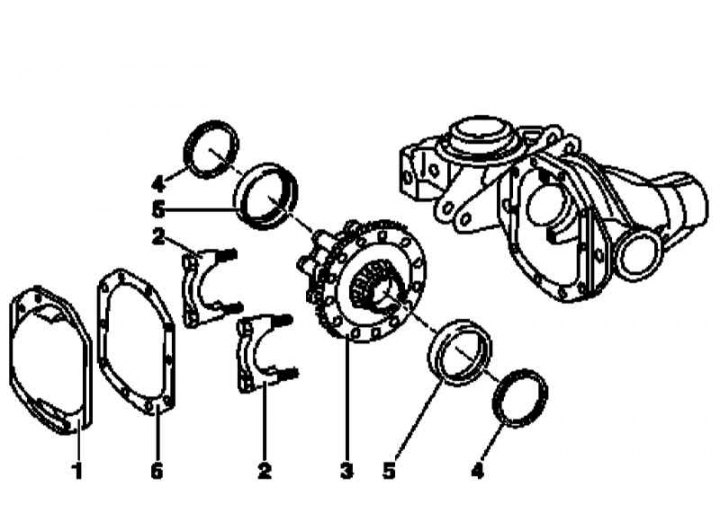
Installation details of the rear axle differential assembly
1 - Cover; 2 - Mounting brackets; 3 - Assembling the differential with the driven gear of the final drive; 4 - Adjusting rings; 5 - Outer clips; 6 - Sealing gasket
The procedure for performing the procedure is similar to that described above for the front axle differential, adjusted for the design of the latter (the order of extraction of semiaxes).