
Removing
1. Remove the rotor and dust shield.
2. Remove the vacuum ignition timing regulator.
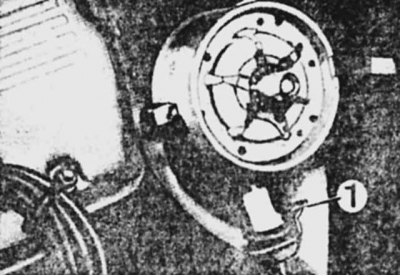
3. Remove mounting bracket 1 and carefully pull out the carrier disc in a straight line.
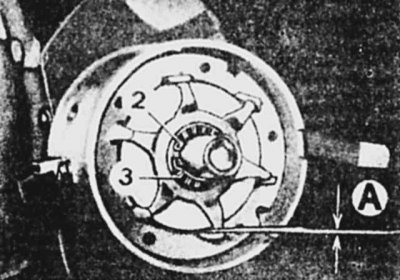
Internal view of the sensor-distributor
4. Rotate the rotor so that its teeth match the teeth of the stator and measure the gap «A», which should be equal to 0.35-0.70 mm.
5. Remove retaining ring 2.
6. Remove spacer ring 3.
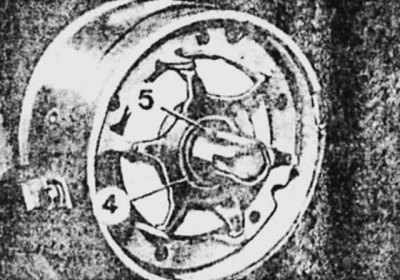
7. Carefully remove the rotor 4 with two screwdrivers inserted from opposite sides, having previously removed the key 5.
8. Remove thrust washer
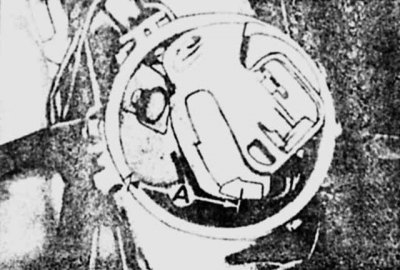
9. Remove the three screws securing the proximity sensor bracket (shown by arrows).
10. Remove retaining ring 6.

11. Squeeze out the mounting brackets and remove the bracket with the proximity sensor.
12. Remove the proximity sensor from the bracket.
Installation
Installation of a new proximity sensor is carried out in the reverse order of removal, taking into account the following:
When installing the distributor sensor, maintain the dimension «A» 3.5 cm between the mark on the body and the rotor.
1. Align the teeth of the sensor shield towards the notch on the carrier plate.
2. When installing the rotor, align the notch on the rotor with the groove on the shaft.
3. When installing the vacuum regulator, rotate the stator to the left.