
Cleaning and checking
1. Remove the hitch ball cap.
2. Remove the ball joint from the vehicle.
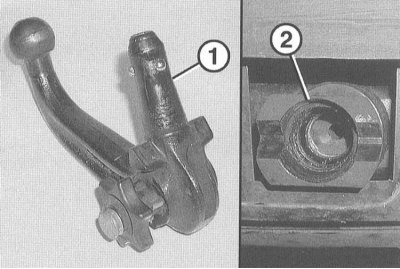
3. Visually check the ball head (1) and support (2). If the support is dirty, clean it with a jet of steam and dry it with air. Clean the ball head with water and a brush and wipe with a dry cloth.
Attention! Do not use steam or any solvent such as petrol to clean the ball head.
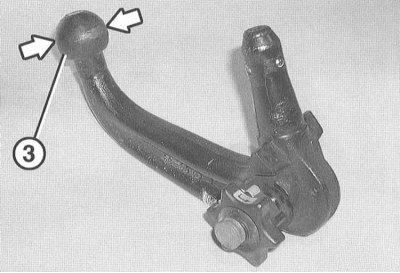
4. Measure the ball diameter of the connector (3). If the diameter is less than 39 mm, replace the ball head.
Checking work
1. Visually check for mechanical damage to the ball head.
2. Pull the handle and turn it to the «rot» («red») so that the handle locks.
3. Insert the ball head vertically into the support until it locks automatically.
Attention! The green mark on the handle should be covered by the white mark on the ball head.
4. Close the handle, after which it should not be able to move outward.
Lubricant

4 - Axis of the handle
5 - Axis of descent
6 - Guide with a ball
7 - The surface of the descent
8 - Guide surface
1. Lubricate the lock with gear oil, motor oil or multipurpose grease.
2. Lubricate the handle shaft with clean engine oil (4) between the ball head and the handle, as well as the escapement axis (5).
3. Lightly grease the following parts on the ball head:
- Guide with ball 6;
- Descent surface 7;
- Guide surface 8.
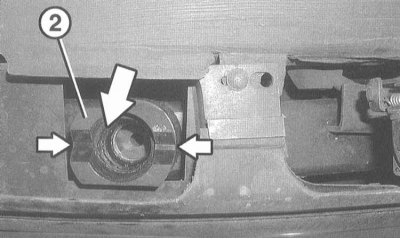
4. Lightly grease the bearing (2) in the places marked with arrows.