
The failure of the incandescent lamp is indicated on the universal display. (The warning system and fault signaling are discussed in Section Warning and warning lamps, as well as information display messages about registered faults).
There is a risk of injury!
Be careful when replacing high voltage xenon headlight bulbs! Just in case, turn off the headlight and disconnect the battery. After replacement, briefly turn the headlight on and off to remove residual voltage. For safety reasons, wear shoes with rubber soles.
Incandescent lamps and lamp holders can become very hot. Therefore, before replacing incandescent lamps, wait until the lighting fixture has cooled down.
Keep lamps out of the reach of children.
Do not use lamps that have been dropped or scratched as they may burst.
Note. The glass bulb of the incandescent lamp should not be taken by hand. To do this, it is best to use napkins or cotton gloves. Fingerprints evaporate and deposit on the reflector, clouding it. Accidental stains on the flask should be removed with a clean, lint-free towel soaked in alcohol.
Incandescent lamps must only be replaced with lamps of the same design.
Replacing the H7 bulb: The bulb is under pressure. Therefore, protective goggles and gloves should be worn.
If after replacement the incandescent lamp does not light, switch the lighting off and on again. If the replaced incandescent lamp does not light after that, contact a service station «Mercedes-Benz».
Attention! The plastic headlight lenses have a protective coating. In no case should they be cleaned and even more so rubbed with a dry cloth. It is also impossible to use any cleaners or solvents for this purpose. Such diffusers should be cleaned with a clean, soft towel.
Before replacing a lamp, make sure that the corresponding switch is turned off.
Dipped beam
Note. To gain easy access to the rear of the headlight, lift and place the rear of the vehicle on stands. Turn away bolts of fastening of a wheel and remove a forward part of a locker of a wing, address to the Section Removal and installation of the front wing locker.
1. Open the hood.
2. Squeeze the strips and remove the cover from the back of the headlight.
Note. The low beam bulb is located in the outer chamber of the headlight.
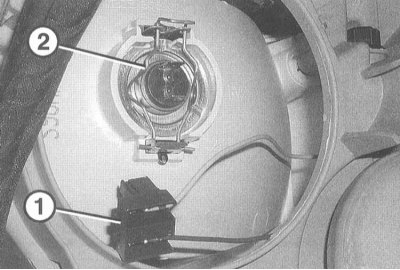
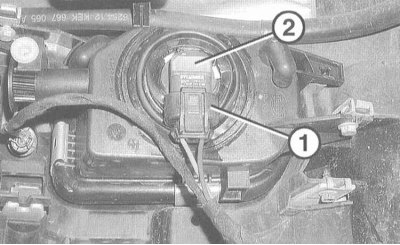
3. Disconnect the lamp connector (1).
4. Halogen headlight: release the retaining clips (2) and take out the lamp.
5. Models with xenon headlights: Press the lock, turn the bayonet ring and remove the xenon lamp from the lamp.
6. Halogen headlight: Insert a new bulb so that the tabs fit into the corresponding grooves on the body. Tighten the retaining clips.
7. Models with xenon headlights: Insert the new bulb so that the groove on the bulb points up. Fit and turn the bayonet ring, making sure the locking lock is in the correct position.
8. Connect the connector on the lamp.
9. Install the cover and fix it.
High beam
Note. To gain easy access to the rear of the headlight, lift and place the rear of the vehicle on stands. Turn away bolts of fastening of a wheel and remove a forward part of a locker of a wing, address to the Section Removal and installation of the front wing locker.
1. Open the hood.
2. Squeeze the strips and remove the cover from the back of the headlight.
Note. The low beam bulb is located in the outer chamber of the headlight.

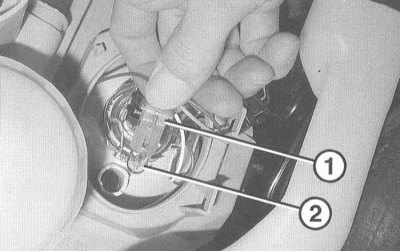
3. Disconnect the connector (1) lamps (2).
4. Detach the retaining clip (3) and take out the lamp. (4) - parking light.
5. Insert a new lamp so that the tabs fit into the corresponding grooves on the body. Lock the locking bracket.
6. Connect the lamp connector.
7. Replace the cover and secure it.
Parking light
Note. To gain easy access to the rear of the headlight, lift and place the rear of the vehicle on stands. Turn away bolts of fastening of a wheel and remove a forward part of a locker of a wing, address to the Section Removal and installation of the front wing locker.
1. Open the hood.
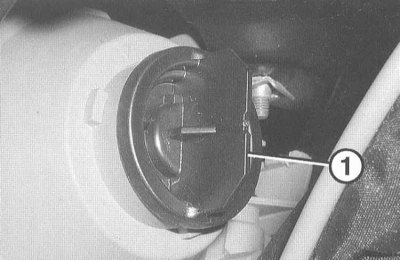
2. Press a lath and remove a cover of a lamp of a driving and parking light.
3. Remove the cartridge from the device (1) with lamp (2).
4. Remove the bulb from the socket.
5. Insert a new lamp into the socket.
6. Insert the cartridge into the instrument.
7. Replace the cover and secure it.
Front turn signal
1. Open the hood.
2. Rotate the chuck (1) with the lamp counterclockwise and remove from the instrument.
3. Push the bulb in, turn it counterclockwise and remove it from the socket.
4. Insert the new bulb and turn it clockwise.
5. Insert the bulb socket into the turn signal and lock it by turning it clockwise.
Turn signal in exterior mirrors
1. Remove facing of a mirror, address to the Section Removal and installation of facing of an external rear-view mirror.

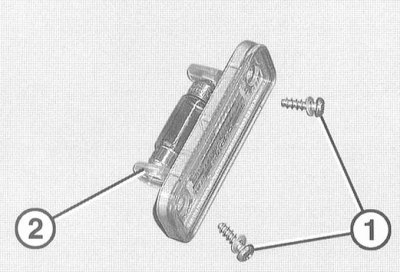
2. Remove the screws (1).
3. Press out the turn signal (2) from the mirror cover. (3) - connector.
4. Open the clamps (1) and remove the bar (2).
5. Take out the lamp (3) and insert a new lamp.
6. Put the lamp bar on the turn signal (4) and fix.
7. Insert the direction indicator into the exterior mirror cover and secure. When doing this, make sure that the pointer is in the correct position in the lining.
8. Establish facing of an external mirror, address to the Section Removal and installation of facing of an external rear-view mirror.
Anti-fog headlight
1. Remove the front locker, refer to Section Removal and installation of the front wing locker.
2. Disconnect the connector (1) fog lamp.
3. Rotate the chuck (2) counterclockwise and take it out.
4. Remove the bulb from the socket.
5. Insert a new lamp into the socket, insert the socket into the headlight by turning it clockwise, and dock the connector.
6. Install the front locker, refer to Section Removal and installation of the front wing locker.
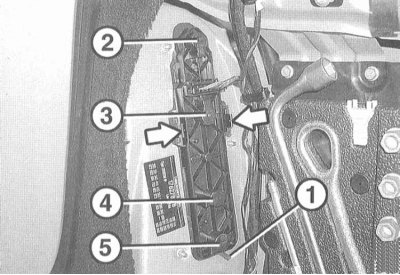
License plate light
1. Remove 2 screws (1).
2. Remove the diffuser with a plastic wedge from the trunk lid or tailgate.
3. Remove the damaged soffit lamp from the plastic holder (2) and replace with a new one.
4. Check diffuser gasket and replace if necessary.
5. Insert diffuser and secure with screws.
Back light
The following lamps are located in the rear light: brake light, side light, turn signal and reversing light. A fog light is located in the rear light on the driver's side.
Sedan
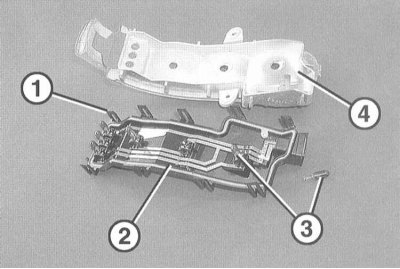
1 - Stop signal; 2 - direction indicator (yellow light); 3 - Reverse lamp; 4 - Parking light; 5 - Foggy Lantern (driver's side); 6 - Lid
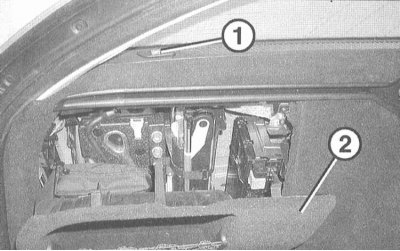
1. Open the trunk.
2. Open the lid (6) in the trunk lining.
3. Disconnect the lamp connector.
4. Rotate the locking lever and remove the lamp bar.
5. Push in the bulb, turn counterclockwise and remove.
6. Insert the new bulb and turn it clockwise.
7. Place the bar of lamps and turn back the locking lever.
8. Connect the lamp connector.
9. Establish a cover in facing of a luggage carrier.
Sports Coupe
1 - Plank of lamps; 2 - Sealing gasket
Station wagon
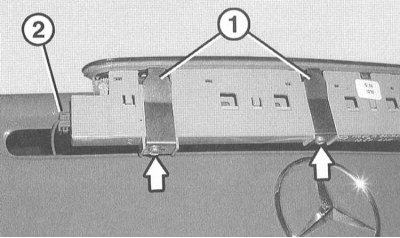
1 - Support foot; 2 - Stop signal; 3 - direction indicator (yellow); 4 - Reverse lamp; 5 - Foggy Lantern (driver's side) /parking light
1. Open the tailgate. Press key (1), lower and remove the cover (2).
2. Disconnect the rear light connector.
3. Squeeze the two stop bars (arrows in the illustration) and remove the bar of lamps, at the same time gently press down on the support tab (1).
4. Push in the bulb, turn counterclockwise and remove.
5. Insert the new bulb and turn it clockwise.
6. Place the bar of lamps and fix it.
7. Dock the rear light connector.
8. Insert the cover and fix it.
Additional brake light
The high-mounted additional brake light operates with special light diodes. In case of failure, the brake light is replaced as a set.
Sedan
1. Open the trunk and remove the trim of the trunk lid, refer to Section Removal and installation of facing of a cover of a luggage carrier.

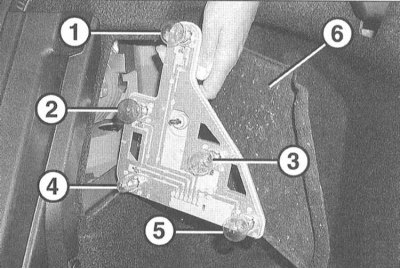
2. Remove 4 screws (arrows in the illustration) on locking brackets (1) additional brake light and squeeze the signal out of the trunk lid.
3. Disconnect the connector (2) additional stop signal.
4. Attach the retaining clips (1) on the new additional brake light (arrows in the illustration. When doing this, make sure that the locking brackets are slightly compressed. Slide the brackets under the stop when installing on the brake light.
5. Plug in the connector.
6. Insert the brake light into the trunk lid so as to prevent damage to the paintwork. When doing this, pay attention to the correct position of the sealing gasket.
Note. If necessary, use Vaseline as a lubricant.
7. Reinstall the lining of the trunk lid, refer to Section Removal and installation of facing of a cover of a luggage carrier.
Station wagon
1. Open the tailgate and remove the lining from it, refer to Section Removal and installation of facing of a door of a back.
2. Remove the rear spoiler, refer to Section Removal and installation of a back spoiler.
3. Disunite a socket of an additional stoplight.
4. Turn out 4 screws of fastening and remove a stoplight from a back spoiler. At the same time, carefully remove the sealing tape from the additional brake light.
5. Installation is carried out in the reverse order of removal.
Sports Coupe
1. Open the tailgate.
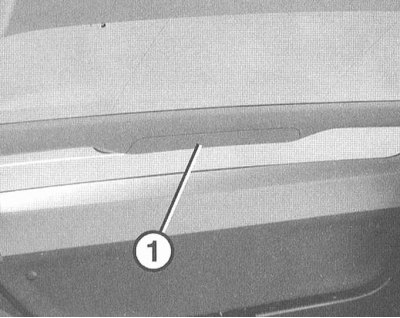
2. Use the plastic wedge to remove the cover (1) from the spoiler cover.
3. Disunite a socket of an additional stoplight.
4. Turn out screws of fastening and remove an additional stoplight from a back spoiler.
5. Installation is carried out in the reverse order of removal. When doing this, make sure that the gasket is in the correct position.