



Contents: Front ceiling lamp ↡ Front reading lamp ↡ Rear ceiling light ↡ Trunk light lamp ↡ Vanity Mirror Lighting ↡ Glove compartment light ↡
1. Turn off the switch of the corresponding lighting fixture.
2. Turn off the ignition.
Front ceiling lamp
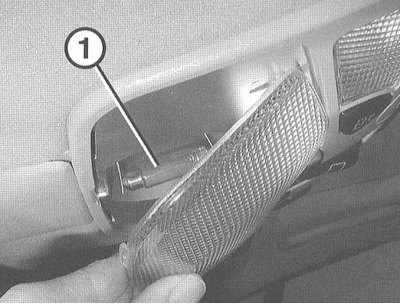
1. Using a plastic wedge, remove the diffuser from the ceiling lamp. Place the wedge in the front center of the diffuser.
2. Remove the damaged spotlight lamp (1) from the holder and replace it.
3. Insert the diffuser into place and fix it with a light blow.
Front reading lamp
There are left and right reading lamps installed on the ceiling.
1. Using a plastic wedge, remove the front lamp from the ceiling.
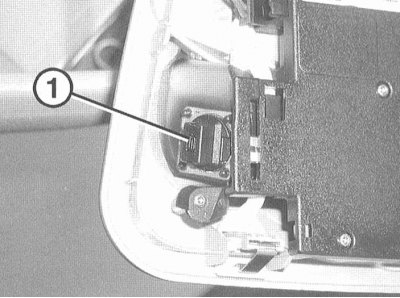
2. Turn the socket (1) counterclockwise and remove it from the lamp.
3. Remove the damaged lamp from the socket and replace it.
4. Insert the cartridge by turning it clockwise.
5. Insert the lamp into the ceiling and fix it.
Rear ceiling light
1. Using a plastic wedge, remove the lamp from the ceiling.
2. Disconnect the lamp connector.
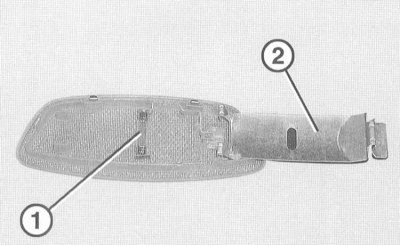
3. Using a screwdriver, remove the cover (2).
4. Remove the damaged spotlight lamp (1) from the socket and replace it.
5. Close the lid.
6. Connect the light connector.
7. Insert the lamp into the ceiling and fix it.
Trunk light lamp
Station wagon
The lamps are inserted on the sides of the trunk.
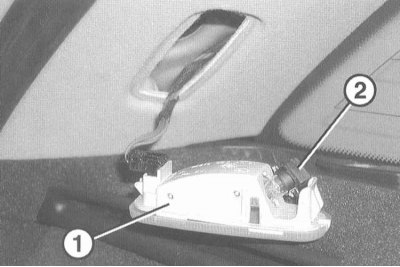
1. Using a screwdriver, remove the lamp (1) from the D-pillar.
2. Remove the socket (2) from the lamp by turning it counterclockwise.
3. Remove the lamp from the socket and replace it with a new one.
4. Insert the cartridge by turning it clockwise.
5. Insert the light into the D-post and fix it.
Vanity Mirror Lighting
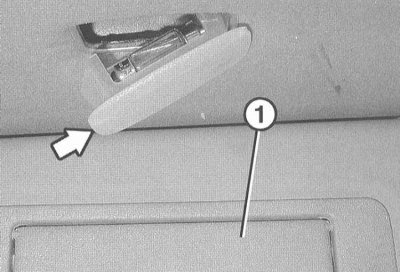
1. Fold the sun visor (1) forward.
2. Remove the diffuser from the ceiling trim by prying it up at the groove with a screwdriver (arrow on the illustration).
3. Remove and replace the damaged spotlight.
Publication taken from an online resource [MercedesMan]
4. Insert the diffuser into place and fix it until you hear a distinct click.
Glove compartment light
1. Remove the cover on the right side of the instrument panel.
2. Open the glove compartment.
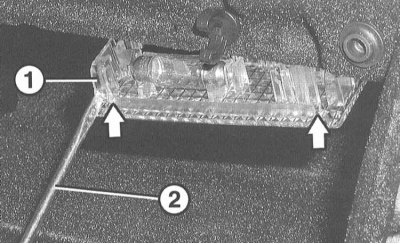
3. Insert the screwdriver (2) into the slots (arrows in the illustration) diffuser and carefully remove the diffuser from the trim. This will release the plastic spring (1) on the light. If necessary, press the light by hand through the opening in the instrument panel.
4. Remove and replace the damaged spotlight.
5. Press the light into the trim and secure it.
6. Close the glove compartment.
7. Close the cover on the instrument panel.