



Contents: Amount of oil to be replaced ↡ Draining engine oil ↡ Visual inspection of oil leaks ↡ Checking the oil level ↡
To change the engine oil, you will need the following tools:
- inspection pit or hydraulic car jack with support trestles;
- set of replacement socket heads for removing the oil filter cover and oil drain plug;
- sump (if the oil is not pumped out) with a capacity of at least 8 liters of oil.
The following wearing parts are required:
- if the oil is not pumped out: an aluminum or copper sealing ring for the threaded oil drain plug (sometimes supplied with an oil filter);
- oil filter cartridge.
Depending on the engine, fill in 5.8 to 7.5 liters of engine oil. For diesel, 6 to 7 liters. Use only engine oil recommended by Mercedes.
Amount of oil to be replaced
| 4-cylinder petrol engine | 5.8 l |
| 6-cylinder petrol engine | 7.5 l |
| 2.0L diesel engine | 6.0 l |
| 2.2L diesel engine | 6.5 l |
| 2.5L diesel engine | 7.0 l |
The oil should be changed once a year. If the car travels more than 15,000 km during this period, the oil should be changed after 15,000 km. At the same time, the filter cartridge is replaced.
Under severe operating conditions, such as short distance driving, relatively frequent cold starts and very dusty road conditions, the oil and oil filter should be changed at shorter intervals.
In a petrol engine, the motor oil can be pumped out at a petrol station using a probe through the oil measuring tube. Do not throw away used oil uncontrollably and do not mix it with household waste, because this causes irreparable damage to the environment, such as pollution of groundwater.
Draining engine oil
1. Warm up the engine to operating temperature until the coolant temperature indicator indicates that the coolant has reached normal operating temperature. Then drive at least another 5 km to ensure that the engine oil temperature is also sufficient.
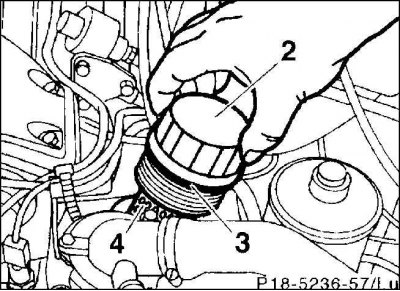
2. Unscrew the oil filter cap (2) using a suitable socket wrench. This allows the engine oil to drain from the oil filter into the oil pan
3. Remove the oil filter cover (2) together with the filter cartridge (4) secured with spring clips.
4. Use an oil suction device to suck out the engine oil through the oil level indicator guide tube. If you do not have an oil suction device, drain the engine oil.
5. Place the vehicle horizontally using trestles or jacks.
6. Remove the lower engine compartment protective cover.
7. Place a container under the oil pan to collect the used oil.
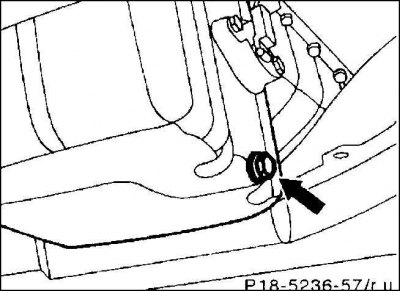
8. Remove the oil drain plug from the oil pan and drain the used oil completely.
Attention! If the engine oil contains large amounts of metal shavings and abrasion products, this indicates malfunctions associated with seizing or corrosion of individual parts, such as damage to the crankshaft or connecting rod bearing. To prevent the possibility of subsequent malfunctions after the repair, be sure to thoroughly clean the lubrication channels and oil hoses. Additionally, if present, the oil cooler should be replaced.
9. Then screw in the oil drain plug with a new sealing ring and tighten it securely to a torque of 25 Nm.
10. Install a new filter cartridge (4) into the oil filter.
11. Screw on the oil filter cover with a new sealing ring (3). Tightening torques: aluminum cover – 20 Nm, plastic cover – 25 Nm.
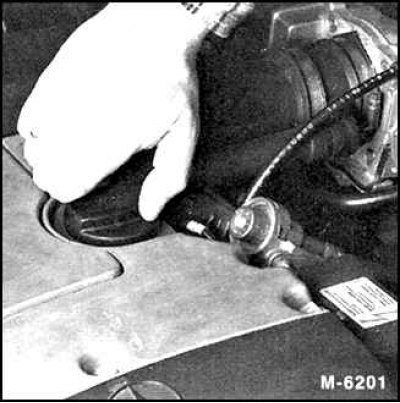
12. Open the threaded cap and pour oil into the filler neck of the cylinder head cover.
Attention! It is recommended to first pour in less than 1/2 l of engine oil, let the engine warm up and after a few minutes check the level using the oil level indicator, add engine oil if necessary. Excess engine oil must be pumped out, otherwise the engine gaskets or catalytic converter may be damaged.
Attention! CD type motor oils, which are offered by the manufacturer exclusively for diesel engines, are not suitable for internal combustion engines with forced spark ignition of the working mixture.
13. Open the threaded cap and pour oil into the filler neck of the cylinder head cover.
14. Lower the car.
15. After a test drive, check the tightness of the drain plug and oil filter, carefully tighten the threaded connections if necessary.
16. With the engine warmed up to operating temperature, check the oil level again approximately 3 minutes after stopping it and make adjustments if necessary.
17. Install the engine compartment protective cover at the bottom.
Attention! In order to better check the operating conditions of the engine, the same type of oil and, if possible, the same brand should be used each time the oil is changed. Therefore, it is advisable to pay attention to the reference plate attached to the engine, which indicates the brand and viscosity of the oil, each time the oil is changed.
Attention! Using different types of oils without sorting them out is unfavorable. If possible, mix motor oils of the same type but different brands. If necessary, you can top up at the turn of the seasons with motor oils of the same type and brand but with different viscosity.
Visual inspection of oil leaks
1. If the engine is lubricated with oil and the oil consumption is high, check where the oil is leaking.
- 1a. Open the oil filler cap and check the seal for porosity or damage.
- 1b. Crankcase ventilation system: e.g. ventilation hose from cylinder head cover to throttle body.
- 1v. Cylinder head cover seal.
- 1g. Cylinder head seal.
- 1d. Oil filter seal: oil filter cover.
- 1st. Oil drain plug thread (sealing ring).
- 1f. Oil pan seal.
- 1z. Oil seals in front and behind the camshaft and crankshaft.
2. Since in most cases, when there are leaks, the oil is distributed over a relatively large surface area of the engine, it is impossible to detect an oil leak at first glance. When searching, it is advisable to proceed as follows.
- 2a. Wash the engine. To do this, spray the engine with a standard low-temperature detergent and, after a short soak, wash it with a water jet. First, cover the generator with a plastic cap.
- 2b. Dust the separation and seal areas on the outside of the engine with lime or talcum powder.
- 2c. Check the oil level, top up if necessary.
- 2g. Conduct a test drive. Since oil becomes liquid when the engine is hot and will therefore appear at leak points more quickly, this test drive should be conducted on a section of about 30 km on the highway.
- 2d. Then inspect the engine with a light bulb, locate the leak and eliminate the defect.
Checking the oil level
Attention! The engine should not consume more than 1.0 l of oil per 1000 km. Greater consumption is a sign of wear of the valve stem oil seals and/or piston rings or oil seals.
Attention! When measuring the oil level, the car must be on a horizontal surface.
Attention! The engine must be warmed up to operating temperature.
Caution: After stopping the engine, wait at least 3 minutes for the oil to collect in the oil pan.
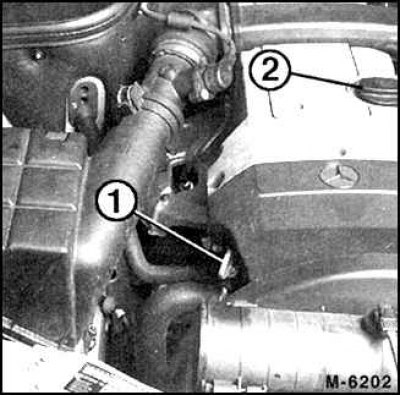
1. Pull out the oil level indicator (1) and wipe it with a clean cloth.
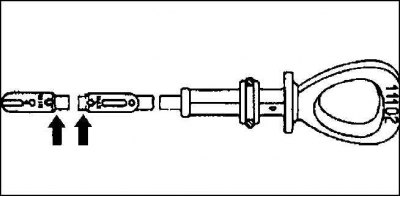
2. Insert the dipstick into the guide tube until it stops and pull it out again. The oil level should be between both markings.
Caution! Add new oil only if the oil level is approaching the "min" mark. The oil volume from "min" to "max" mark is approximately 2.0 l.
Attention! Oil is added to the valve (2) of the cylinder head cover. When adding oil, use the appropriate grade of oil, do not use oil additives.