
Filter element
Removing
1. Turn away nuts of fastening from the top cover of an air cleaner. Working around the top cover, release all latches (see fig. 3.1. a, b).
Pic. 3.1, a. Loosen the nuts...
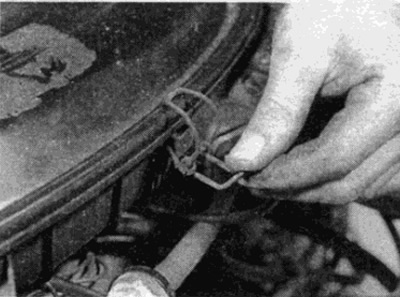
Pic. 3.1b....and unfasten the latches
2. Remove the air cleaner cover, then separate the crankcase ventilation hose (where provided) and remove the filter element (see fig. 3.2).
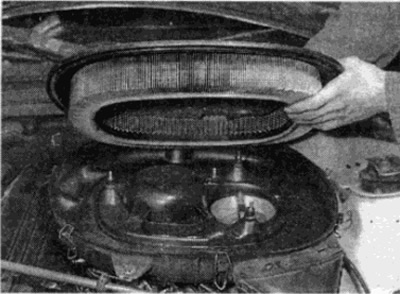
Pic. 3.2. Lift the air cleaner cover and remove the filter element
Installation
3. Installation of a new filter is carried out in the reverse order. Make sure that the filter element is installed with the correct side up, according to the mark on the top surface.
Air cleaner assembly
Removing
4. Loosen the screw (where provided) and disconnect the air pipe going from the air cleaner to the air intake in the front of the engine compartment (see fig. 3.4).
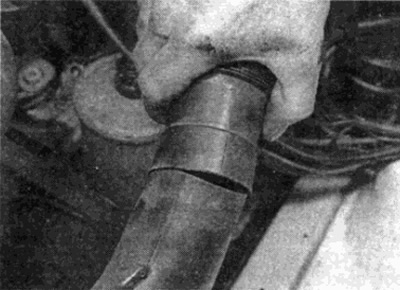
Pic. 3.4. Disconnect the air hose from the air cleaner
5. Where necessary, remove the crankcase breather hose from the air cleaner side port.
6. Check that the ignition is off and, where provided, disconnect the plug from the intake air temperature sensors on the side of the air cleaner.
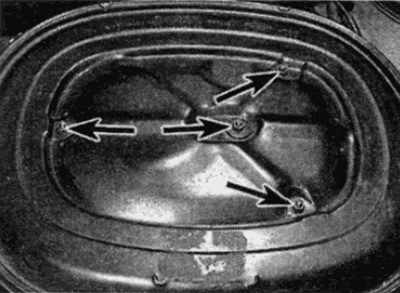
7. Where required, remove the nuts that hold the bottom of the air cleaner to the intake manifold/fuel distributor assembly (see fig. 3.7, a-c).
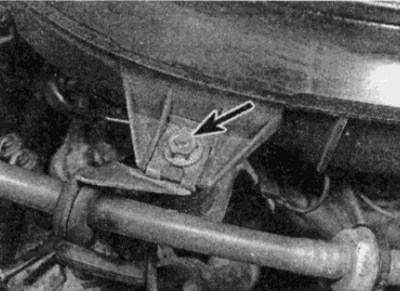
Pic. 3.7, a. Unscrew the nuts securing the lower part of the air cleaner in front...
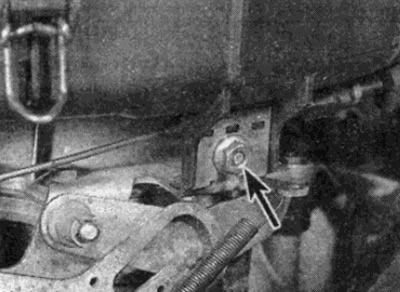
Pic. 3.7b....on the side...
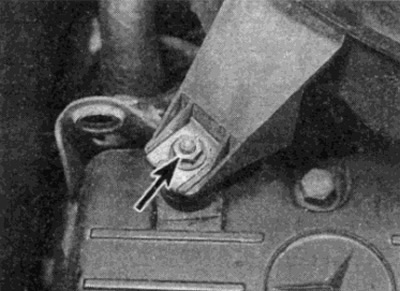
Pic. 3.7, c....and behind
8. Unfasten the air cleaner cover, unscrew the fastening nuts and remove the filter as described in the previous section. Loosen the mounting screws/nuts, then lift the bottom section of the air cleaner and disconnect the ventilation hose where required (see fig. 3.8). Remove the rubber seal.
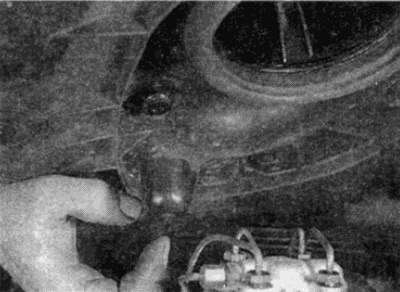
Pic. 3.8. Raise the air cleaner, disconnect the ventilation hose
Installation
9. Installation is carried out in the reverse order. However, check that the rubber seal between the air cleaner and the fuel distributor is secure.