
Note: The steps for removing and installing the cooling system sensors included in the power and ignition systems are described in the relevant parts Chapters 4.
Coolant level sensor
Removing
1. The sensor is located on the side of the expansion tank (see fig. 6.1). Check that the engine has cooled down, then following the description in Chapter 1, partially drain the cooling system to free the expansion tank.
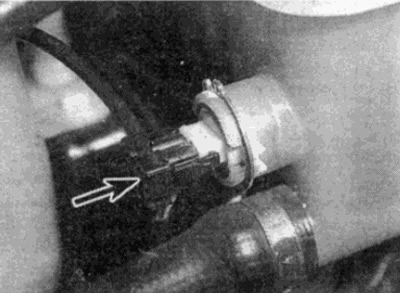
Pic. 6.1. Location of coolant level sensor (shown by arrow)
2. Check that the ignition is off, then disconnect the plug from the fluid level sensor connector.
3. Remove a lock ring and take the gauge from a broad tank. Remove the o-ring if it is loose.
4. Connect a probe or multimeter set to measure resistance between the sensor contacts. Holding the float at the top point, the resistance should be large (open circuit). If the float is lowered so that it hangs at the bottom of its stroke, the circuit should close and the resistance is zero.
Installation
5. Installation is carried out in the reverse order. Consider the following features:
- A) Install a new O-ring to the sensor housing.
- b) When finished, add coolant to the system as described in Chapter 1.
Coolant Temperature Gauge Sensor
Removing
6. The sensor that controls the coolant temperature gauge is screwed into the top of the cylinder head on the left side of the engine. Do not confuse it with the coolant temperature sensor in the power / ignition system, which is mounted nearby.
7. Check that the engine is cool, then follow the description in Chapter 1, partially drain the cooling system to free the expansion tank.
8. Make sure the ignition is off, then disconnect the plug from the sensor connector.
9. Turn out the gauge from a head of cylinders and remove a sealing ring.
Installation
10. Installation is carried out in the reverse order. Consider the following features:
- A) Install a new O-ring to the sensor housing.
- b) When finished, add coolant to the system as described in Chapter 1.