
Removing
1. Disconnect the negative battery terminal.
2. Depending on the type of equipment installed, the removal method is slightly different. If there are two vertically positioned holes on each side of the radio bezel, then the radio is DIN·mountable and is removed by inserting two special bent tools into these holes to release the internal latches. These attachments are available from radio supply stores or can be made from a suitable wire rod such as a welding rod.
3. Insert the removal tools into the slots until you feel that they have disengaged the latches. Then pull the knot out of the socket (see fig. 22.3).
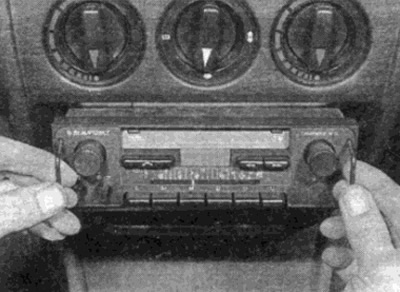
Pic. 22.3. Removing the radio using the removal tools
4. Disconnect the electrical connectors and antenna wire from the back of the radio (see fig. 22.4) and push the fastening latches inward to remove the removal tools. Remove the assembly from the vehicle.
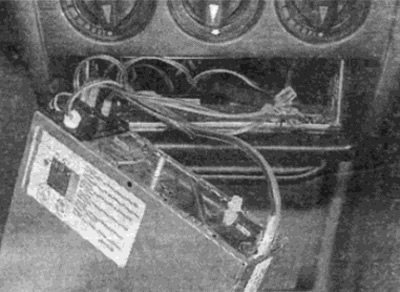
Pic. 22.4. Disconnect the wires from the rear of the radio
5. To install, push the radio back into its socket until the latches click into place.
6. If the radio does not have holes for accessories, then it is fastened with ashtray screws.
7. Open the ashtray and remove the screws on top of the ashtray holder.
8. Lower the ashtray and push the radio out of the socket.
9. Disconnect electric sockets and a wire of the antenna behind and remove a radio radio tape recorder from the car.
Installation
10. Installation is carried out in the reverse order.