
Removing
2. Disconnect the negative battery terminal. Raise the front of the car with a jack and place it on stands (see "Lifting the vehicle and placing it on stands").
3. Remove the engine crankcase protection as described in Chapter 11.
4. Refer to the relevant part chapter 4 and remove the air cleaner. To gain more space, remove the bolt and remove the intake manifold support strut.
5. Where provided, remove the bolts and remove the hose guide bracket from the sump and slide the hose out of the way.
6. Where provided, remove screws and nuts and disconnect wires from starter.
7. Turn the steering wheel fully until it stops so that the left steering arm does not interfere with the removal of the starter.
8. Turn away nuts, then turn out the top and bottom bolts of fastening of a starter.
9. Slide the starter out of the hole in the bell housing and lower it out of the engine compartment (see fig. 8.9).
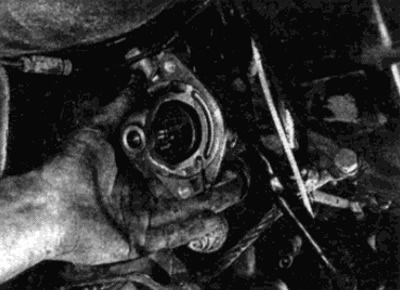
Pic. 8.9. Pull the starter out of the hole in the housing and lower it out of the engine compartment
Diesel engines with oil heat exchanger
10. Follow the steps described in paragraphs 1-4, inclusive.
11. Connect the hoist and winch to the engine rigging brackets. Raise the hoist to hang the engine, then remove the left and right engine mount bolts. Where required, also unscrew the shock absorber on the right side of the vehicle - see Fig. Chapter 2D.
12. Continue to raise the hoist until there is enough clearance to pull the starter out.
13. Turn away nuts, then remove the top and bottom bolts of fastening of a starter.
14. Slide the starter out of the hole in the bell housing and lower it out of the engine compartment.
Installation
15. Installation of a starter is carried out upside-down.