
Cars BMW Cars Volkswagen Cars Chevrolet Cars Land Rover Cars Lada Cars Honda Cars Peugeot
English Русский
Български
Беларускі
Український
Српски
Hrvatski
Română
Polski
Slovenský
Magyar
Bookmark News and articles Sitemap Feedback Site search
MercedesMan.ru


A-Class C-Class E-Class G-Class M-Class S-Class Others
190 (W201) (1982-1993) W202 (1993-2000) W203 (2000-2007)
  • Main
  • C-Class
  • W201 (1982-1993)
  • Power unit
  • Charge and start system
  • Generator — Voltage Regulator Brush Holder Replacement

Generator — Voltage Regulator Brush Holder Replacement (Mercedes-Benz C-Class W201)

0
1. Remove the generator as described in paragraph 5.

2. Place the generator on a clean surface with the pulley facing down.

3. On models equipped with a compact generator, loosen the mounting screws, then pry up the tabs and remove the plastic cover on the back of the generator.

4. Loosen and remove the brush holder/voltage regulator mounting screws, then remove the assembly from the generator (see Fig. 6.4, a-g).
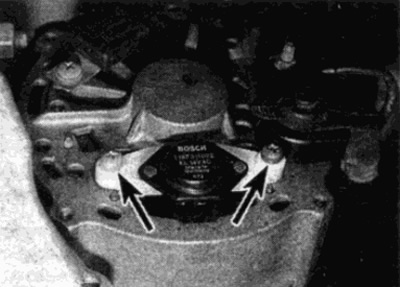
Fig. 6.4, a. Remove the screws securing the brush holder/regulator...
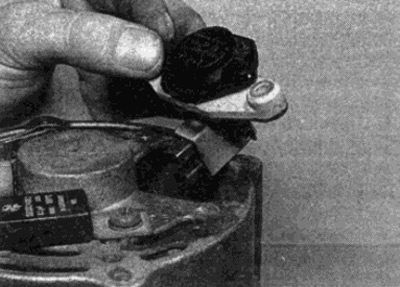
Fig. 6.4, a. Remove the screws securing the brush holder/regulator...


Fig. 6.4, b....then remove the regulator from the generator - a normal generator
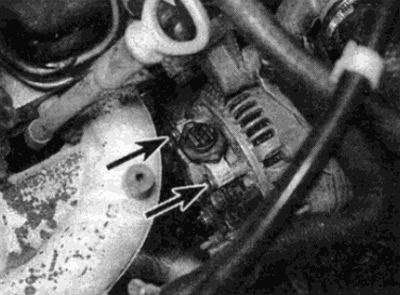
Fig. 6.4, b....then remove the regulator from the generator - a normal generator


Fig. 6.4, c. Unscrew the fastening screws...
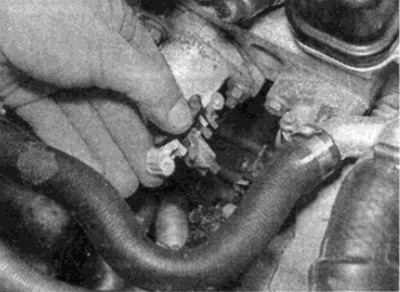
Fig. 6.4, c. Unscrew the fastening screws...


Fig. 6.4, g....and remove the unit from the generator - «compact» generator

Fig. 6.4, g....and remove the unit from the generator - "compact" generator


5. Measure the free length of the brushes - take the measurement from the manufacturer's emblem, which is etched on the side of the brush, to the shallowest part of the rounded end of the brush. Check the technical data - replace the brushes if they are worn below the permissible limit.


6. Check the surface of the slip rings on the end of the alternator shaft. If they are worn, burnt or corroded, replacement should be considered - consult an automotive electrical specialist for advice.

7. Assemble the generator in reverse order. When finished, refer to paragraph 5 and install the generator.
This article is available at: russian, bulgarian, belarusian, ukrainian, serbian, croatian, romanian, polish, slovak, hungarian
The article has been verified: Lukyanov Nikita Ilyich
Share with friends:
◀ Previous
C-Class 190 (W201) / Charge and start system
Next ▶

Generator — removal and installation
Generator/Charging System — On-Vehicle Testing
Battery — Removal and Installation
Battery — control and charging
General information and warnings
Engine Starting System — Check
Starter — removal and installation
Starter — repair
More similar articles for repairing other models

☛ Checking the generator voltage Mercedes W168 (1997-2004)
☛ Replacing the voltage regulator unit and brush holder Mercedes W124 (1984-1995)
☛ Checking and replacing spark plugs, checking the condition of… Mercedes W463 (1999-2019)
☛ Removal and installation the voltage regulator Mercedes W163 (1997-2005)
☛ Voltage Regulator — Check Mercedes W126 (1979-1991, petrol)
☛ Replacing the brushes and voltage regulator of the generator Mercedes Sprinter (1995-2000, diesel)
Link in different formats to this article
Comments and feedback from visitors
No comments yet


How much will 48 + 17 ?


W203 (2000-2007) 
  • General information
  • Introduction to guide
  • User manual
  • Maintenance
  • Power unit
  • Gasoline engines
  • Diesel engines
  • Cooling system
  • Ventilation and heating
  • Supply system
  • Injection system (gasoline)
  • Injection system (diesel)
  • Exhaust system
  • Ignition and control system
  • Charge and launch systems
  • Transmission
  • Mechanical gearbox
  • Automatic gearbox
  • Clutch and drive shafts
  • Differential
  • Chassis
  • Brake system
  • Car suspension
  • Steering
  • Body
  • Exterior (external elements)
  • Interior (internal elements)
  • Electrical equipment
  • Equipment and devices
  • Lighting system
  • Electrical diagrams (2000)
  • Electrical diagrams (since 2001)
W202 (1993-2000) 
  • General information
  • User manual
  • Driving a car
  • Car care
  • Maintenance
  • Power unit
  • Gasoline engines
  • Diesel engines
  • Lubrication system
  • Cooling system
  • Heating and ventilation
  • Ignition system
  • Fuel system
  • Injection system (gasoline)
  • Injection system (diesel)
  • Exhaust system
  • Transmission
  • Clutch
  • Car gearbox
  • Chassis
  • Suspension, wheels and tires
  • Steering
  • Brake system
  • Body
  • Exterior (external elements)
  • Interior (internal elements)
  • Doors and windows
  • Electrical equipment
  • Equipment and devices
  • Power devices
  • Lighting system
  • Electrical circuits
190 (W201) (1982-1993) 
  • General information
  • Introduction to the guide
  • Operation and care
  • Maintenance (gasoline)
  • Maintenance (diesel)
  • Troubleshooting
  • Power unit
  • Petrol engine I4
  • Petrol engine V6
  • Diesel engines
  • Engine overhaul
  • Cooling and heating
  • Power system (carburetor)
  • Injection system (gasoline)
  • Injection system (diesel)
  • Exhaust system
  • Charge and start system
  • Ignition system (I4)
  • Ignition system (V6)
  • Diesel heating system
  • Transmission
  • Clutch
  • Mechanical gearbox
  • Automatic gearbox
  • Cardan shaft and axle shafts
  • Chassis
  • Brake system
  • Car suspension
  • Steering
  • Body
  • Exterior (external elements)
  • Interior (internal elements)
  • Doors, locks and windows
  • Electrical equipment
  • Equipment and devices
  • Electrical circuits
 
MercedesMan.ru © 2017–2026 · Mobile version · Read about Mercedes · Sitemap: EN BG BY UA RS HR RO PL SK HU · Feedback · Site search · Bookmark A-Class (W168) · C-Class (W201) · C-Class (W202) · C-Class (W203) · E-Class (W123) · E-Class (W124) · E-Class (W210) · G-Class (W463) · M-Class (W163) · S-Class (W116, petrol) · S-Class (W126, petrol) · S-Class (W140) · S-Class (W220) · Sprinter · Vito 1 · Vito 2 · Vario 814D ·
 
We only use cookies without which some of the site's features may not be available.