



Thermostat installation details
Thermostat installation details for models with M104.94/99 series petrol engines; thermostat is installed with a ball valve (indicated by an arrow on the callout) up.
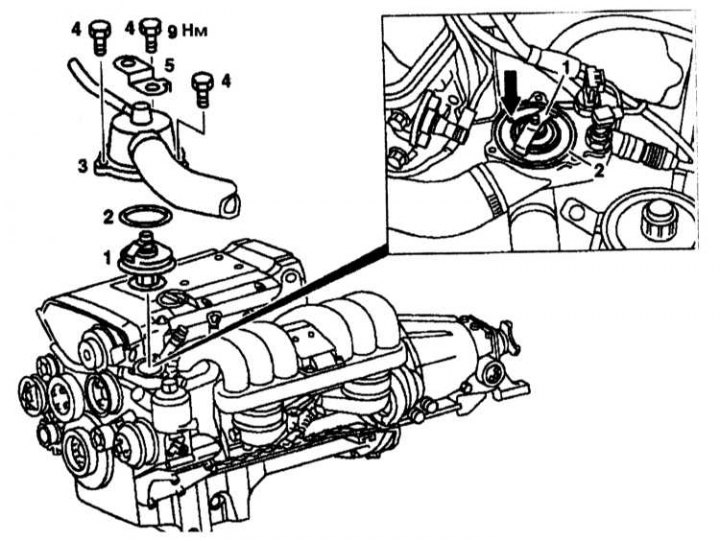
1 - Thermostat; 2 - Seal; 3 - Thermostat cover; 4 - Bolts; 5 - Bracket
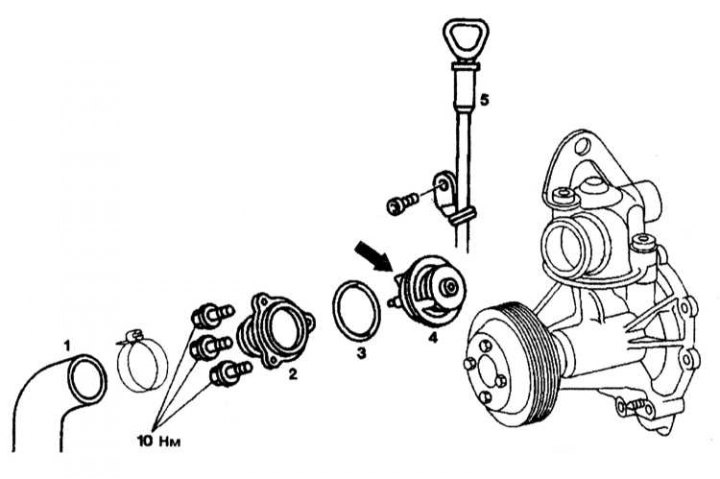
Thermostat installation details for models with petrol engines of the 119.97/98 series
1 - Branch pipe; 2 - Lid; 3 - Sealing ring; 4 - Thermostat; 5 - Engine oil level dipstick
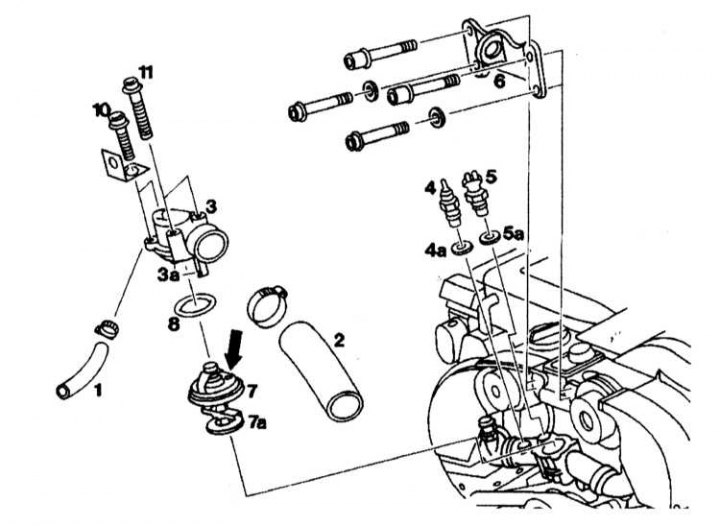
Thermostat installation details for models with petrol engines of the 120.980/982 series
1, 2 - Branch pipes; 3 - Thermostat housing cover; 4, 5 - Temperature sensors; 4a, 5a - Seals; 6 - Bracket; 7 - Thermostat; 7a - Profile plate; 8 - Sealing ring; 10, 11 - Bolts
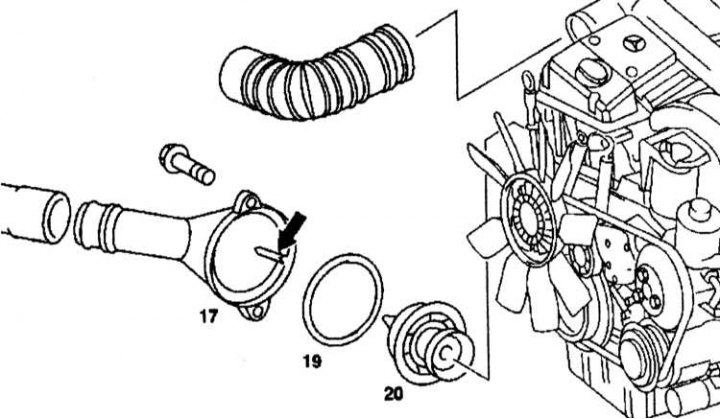
Thermostat installation details for diesel engine models
17 - Thermostat housing; 19 - Sealing ring; 20 - Thermostat
Removal
1. Disconnect the ground cable from the battery.
(Text republished from the website: mercedesman.ru)
2. Drain the cooling system (see Chapter Routine maintenance). If you are not going to add new fluid to the system, save the drained fluid for future use.
3. Disconnect the pipe from the thermostat housing.
4. Remove the thermostat cover/housing.
5. Remove the thermostat from the housing - try to remember the location of the air bleed ball valve and the orientation of the thermostat itself.
Installation
Installation is carried out in the reverse order of removal. Do not forget to replace the sealing ring.
Note: The thermostat is installed with the air bleed ball valve facing up.