



Petrol engines 111, 112
Removal
1. Remove the generator, refer to the relevant section.
2. Unscrew the nuts on the terminals.
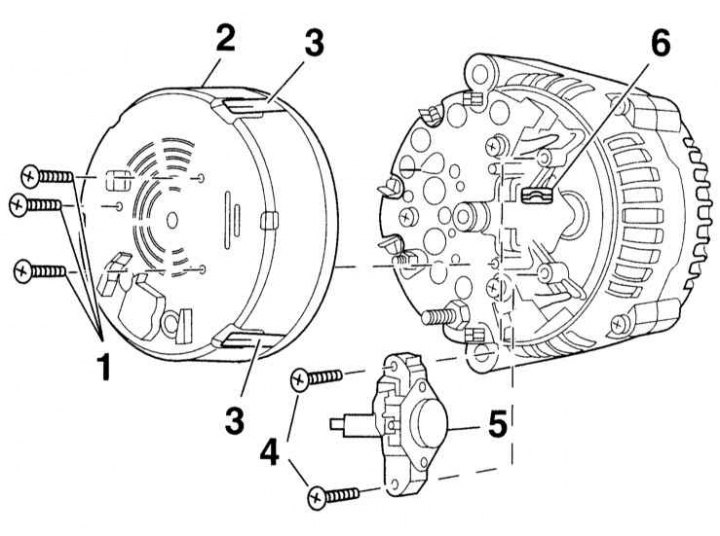
3. Unscrew the screws (1) and remove the protective cover (2) from the generator, while moving the locking strips (3) apart.
Note: Depending on the engine model, generators of different power may be installed.
4. Unscrew the screws (4) and take the regulator (5) to the side. (6) – ground connection.
5. Replace the brushes by unsoldering the cables.
6. Check the wear of the contact rings, if necessary, grind and polish them (work of the service station).
Installation
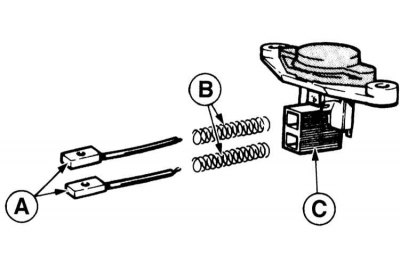
1. Insert new brushes (A) and springs (B) into the brush holder (C) and solder them. The illustration is for informational purposes only and may not fully correspond to the model in question.
2. To avoid getting solder in when soldering new brushes, hold the cables with pliers.
The solder causes the cables to harden, making them inoperable.
3. Install and secure the voltage regulator.
4. After installing new brushes, check that they move easily in the brush holders.
5. Attach the protective cover to the generator.
6. Fasten the nuts to the terminals.
7. Install the generator, refer to the relevant section.