
Radiator and fan
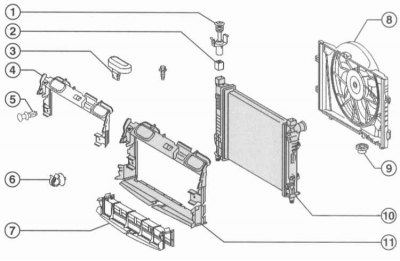
1 - Finger, fastening element, front center; 2 - Rubber support top; 3 - Cover, fastening element, front center; 4 - Top air duct; 5 - Rivet, fastening element, front center; 6 - Wire holder; 7 - Air duct lower; 8 - Electric fan; 9 - Rubber support lower; 10 - Radiator; 11 - Guide for air going to the central module
Radiator and expansion tank
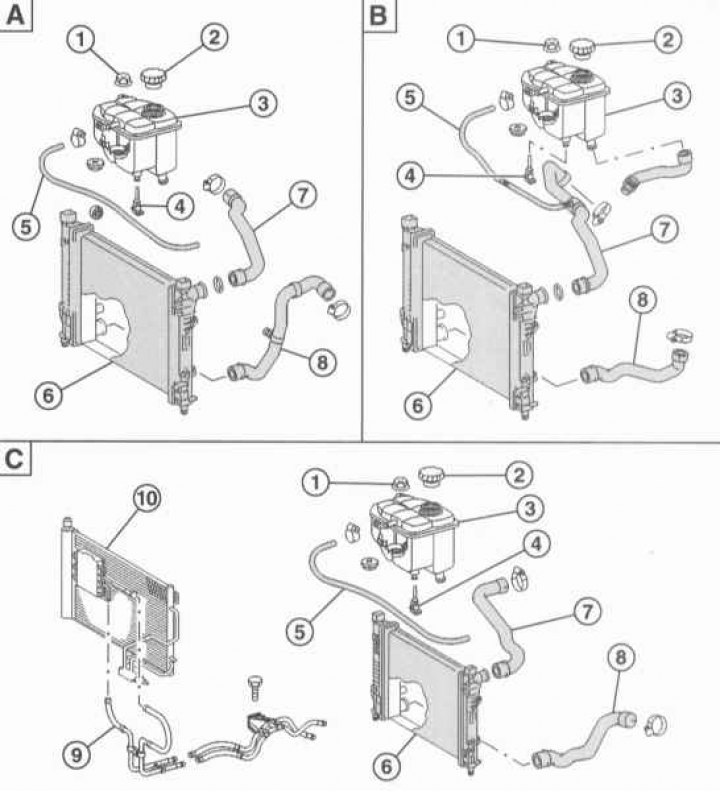
A - 4-cylinder gasoline engine 111; B - 6-cylinder gasoline engine 112; C - Diesel engines; 1 - Expansion tank nut; 2 - Cover; 3 - Expansion tank; 4 - Sensor-switch of the coolant level indicator; 5 - Ventilation hose; 6 - Radiator; 7 - Upper radiator hose; 8 - Lower radiator hose; 9 - Coolant pipeline; 10 - Capacitor
Removing
1. Remove the electric fan, refer to the relevant section.
2. Remove the horn, refer to Section Removal and installation of a sound signal.
3. Disconnect the power steering hydraulic line from the lock holder.
4. Disconnect the holder of the lock at a bumper.
5. Open the 3 clips on top of the lock holder.
6. Disconnect the connector at the right hood lock.
7. Cut and remove the cable connector at the lock holder. Mark the installation position with a felt-tip pen.
8. Disconnect the hood drive.
9. Remove the lock holder.
10. Drain coolant, refer to appropriate section.
11. Remove radiator hoses. To do this, squeeze the corresponding bracket with a screwdriver so that it locks into place.
12. Wring out brackets at the left and on the right at a radiator. At the same time, pull the upper part of the capacitor forward and disconnect it from below.
13. Pull the radiator up.
Installation
1. Replace the capacitor. At the same time, make sure that the trunnions of the radiator below sit in the rubber supports.
2. Install the capacitor at the bottom into the holders and secure at the top with the retaining clips.
3. Install the hose with new o-rings.
4. Further installation is performed in the reverse order of removal.