
Removing
CMP Sensor Installation Details
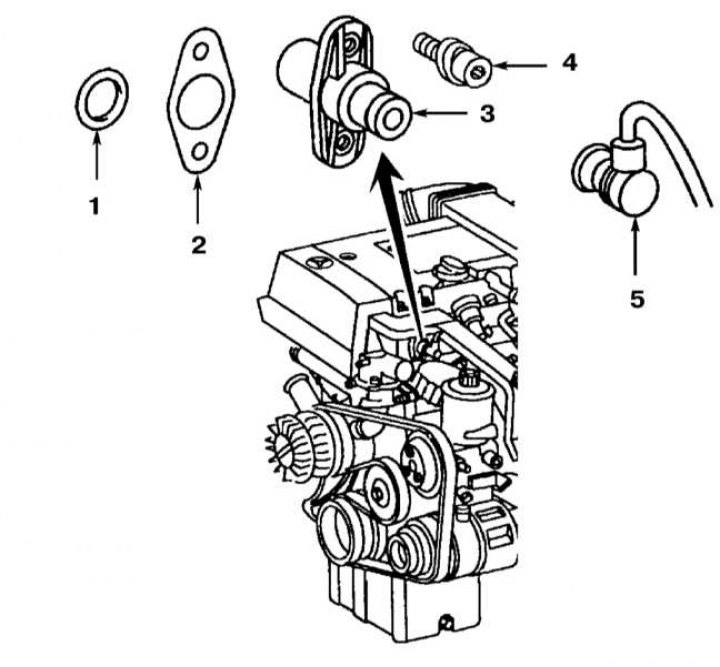
1 - O-ring; 2 - Adjusting washer; 3 - Bolt; 4 - CMP sensor; 5 - Pin connector
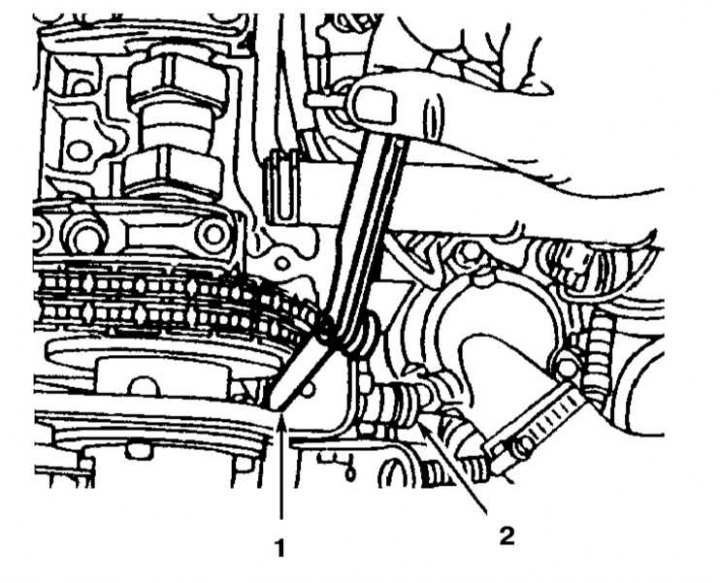
CMP Sensor Gap Adjustment
1 - Probe
2 - CMP sensor
1. Remove the cylinder head cover.
2. Turn out fixing bolts and remove the gauge CMP, a sealing ring and an adjusting washer.
Installation and adjustment
Attention! Failure to perform the gap adjustment procedure on a new CMP sensor may result in damage to the sensor!
1. When replacing the old sensor, proceed in the reverse order to the dismantling of the components - do not forget to replace the o-ring.
2. When installing a new sensor, install the O-ring, install the sensor, then rotate the crankshaft so that the camshaft sprocket segment is opposite the sensor.
3. Using a blade-type feeler gauge, measure the gap between the sensor and the sprocket segment. The required clearance is 0.4-0.6 mm. If necessary, make an appropriate adjustment by selecting a new shim - washers are available in a thickness range from 0.1 to 1.0 mm in 0.1 mm increments.
4. After completing the adjustment, tighten the sensor mounting bolts with the required force.