
Cars BMW Cars Volkswagen Cars Chevrolet Cars Land Rover Cars Lada Cars Honda Cars Peugeot
English Русский
Български
Беларускі
Український
Српски
Hrvatski
Română
Polski
Slovenský
Magyar
Bookmark News and articles Sitemap Feedback Site search
MercedesMan.ru


A-Class C-Class E-Class G-Class M-Class S-Class Others
W123 (1976-1985) W124 (1984-1995) W210 (1996-2002)
  • Main
  • E-Class
  • W124 (1984-1995)
  • Electrical equipment
  • Headlights and lighting
  • External lighting devices

External lighting devices (Mercedes-Benz E-Class W124)

0
Contents: Headlights ↡ Front direction indicator ↡ Turn signal repeater ↡ Rear lights ↡ License plate light ↡

Headlights


Unscrewing the headlight wiper arm mounting nut
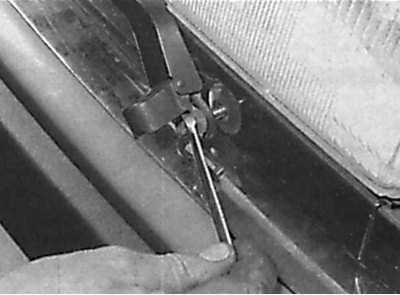


Unscrewing the headlight wiper arm mounting nut


Location of screws for fixing the decorative panel at the base of the headlight
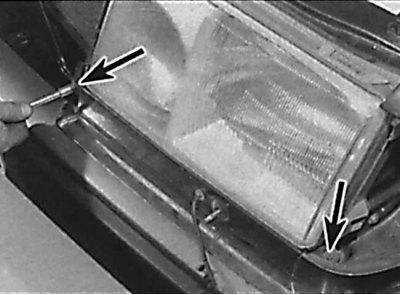


Location of screws for fixing the decorative panel at the base of the headlight


Location of the inner headlight mounting bolt
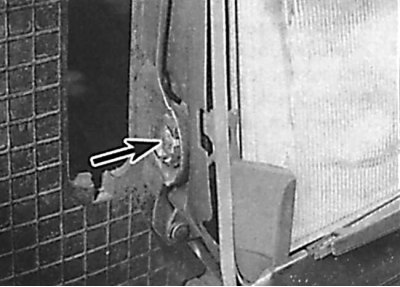


Location of the inner headlight mounting bolt


Location of outer headlight mounting bolts
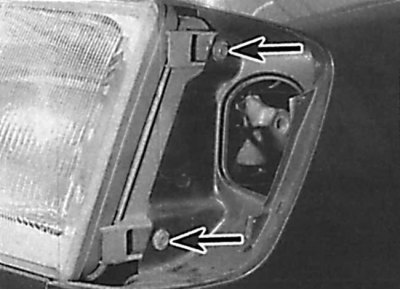


Location of outer headlight mounting bolts


Releasing the upper headlight retainer
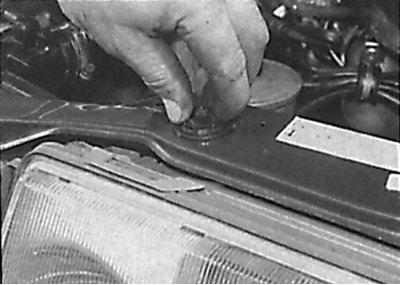


Releasing the upper headlight retainer


Disconnecting the vacuum hose and electrical connector from the headlight
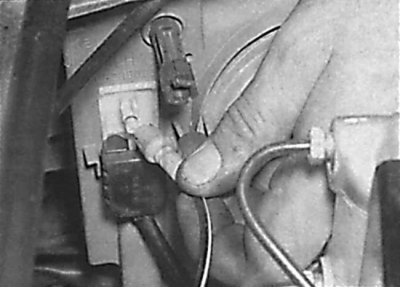


Disconnecting the vacuum hose and electrical connector from the headlight


Removal a headlight from a car
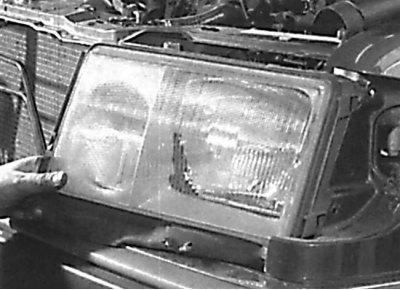


Removal a headlight from a car


1. On models with headlight wipers, mark the position of the wiper arm in relation to the headlight. Lift the cap covering the wiper arm shaft, then unscrew the arm mounting nut and remove the headlight wiper arm (see fig. Unscrewing the headlight wiper arm mounting nut).


2. Remove the turn signal bulb.

3. Remove the screws and trim panel located at the base of the headlight. On models with headlight washers, disconnect the washer hose (see Fig. Location of screws for fastening the decorative panel at the base of the headlight).

4. Unscrew the headlight mounting bolts (see fig. Location of inner headlight mounting bolt, Location of outer headlight mounting bolts).

5. Release the upper headlight retainer by turning it 90°, then remove the headlight and disconnect the vacuum hose and electrical connector from it (see fig. Releasing the upper headlight retainer, Disconnecting the vacuum hose and electrical connector from the headlight, Removing the headlight from the vehicle), if necessary, remove the headlight glass.

6. Installation is performed in the reverse order of removal. Slightly tighten the headlight mounting bolts and check the alignment of the headlight with the lower decorative panel and the hood. If necessary, adjust the position of the headlight by loosening the mounting bolts and the upper retainer. Finally, check the adjustment of the headlight beam.

Front direction indicator


Removal the bulb from the turn signal housing
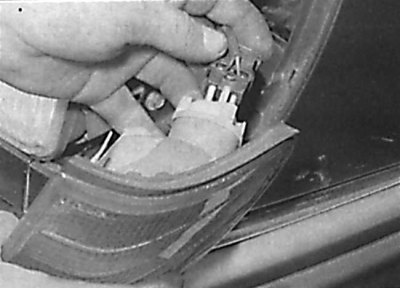


Removal the bulb from the turn signal housing


1. Release the retaining clip and remove the bulb from the turn signal housing. Disconnect the electrical connector from the turn signal housing and remove it (see Fig. Removing the bulb from the turn signal housing).


2. Installation is performed in the reverse order of removal. Check that the locking tabs of the turn signal are inserted into the guides on the headlight.

Turn signal repeater


1. Carefully slide the turn signal repeater forward and remove it from the wing. Turn the bulb holder counterclockwise and remove it from the turn signal repeater housing.

2. Installation is carried out in the reverse order of removal.

Rear lights


1. From the luggage compartment, release the mounting bracket and remove the bulb holder from the rear of the lamp, then disconnect the electrical connector.

2. Unscrew the nuts, then release the mounting brackets and remove the taillight from the car. Remove the gasket located between the taillight and the body. Check the condition of the gasket and, if damaged, replace it.

3. Installation is performed in the reverse order of removal. Check that the rear light gasket is installed correctly.

License plate light


1. Remove the screws and the license plate light from the trunk lid or tailgate and disconnect the electrical connector from it.

2. Installation is performed in the reverse order of removal. Do not overtighten the license plate light mounting screws, as it can easily break.
This article is available at: russian, bulgarian, belarusian, ukrainian, serbian, croatian, romanian, polish, slovak, hungarian
The article has been verified: Levin Kirill Glebovich
Share with friends:
◀ Previous
E-Class W124 / Headlights and lighting
Next ▶

Switch illumination lamps
Heater control panel illumination lamp
Glove compartment light
Instrument cluster lights
Trunk light lamp
Headlight adjustment
More similar articles for repairing other models

☛ Removal external fogging of glass Mercedes W168 (1997-2004)
☛ Replacement of incandescent lamps for outdoor lighting devices Mercedes W203 (2000-2007)
☛ Replacing interior lighting bulbs Mercedes W463 (1999-2019)
☛ Outdoor lighting (ML 430) Mercedes W163 (1997-2005)
☛ Installation of electrical and electronic devices Mercedes W140 (1991-1998)
☛ External lighting control Mercedes Vito 2 (2003-2014, diesel)
Link in different formats to this article
Comments and feedback from visitors
No comments yet


How much will 25 + 40 ?


W210 (1996-2002) 
  • General information
  • Vehicle description
  • Working conditions and tools
  • Car care
  • Diesel engines
  • Engine repair
  • Lubrication system
  • Cooling system
  • Injection system
  • Supply system
  • Exhaust system
  • Gasoline engines
  • Engine repair
  • Lubrication system
  • Cooling system
  • Control system
  • Power and exhaust system
  • Transmission
  • Clutch
  • Mechanical gearbox
  • Automatic gearbox
  • Drive shafts
  • Chassis
  • Car suspension
  • Steering
  • Tires and wheels
  • Brake system
  • Body
  • Exterior (external elements)
  • Interior (internal elements)
  • Doors and windows
  • Heating and ventilation
  • Electrical equipment
  • Equipment and devices
  • Power devices
  • Lighting and signaling
  • Electrical circuits
W124 (1984-1995) 
  • General information
  • Governing bodies
  • Driving and operation
  • Weekly care
  • Maintenance (gasoline)
  • Maintenance (diesel)
  • Troubleshooting
  • Power unit
  • I4 petrol engine
  • V6 petrol engine (SOHC)
  • V6 petrol engine (DOHC)
  • Diesel engines
  • Engine overhaul
  • Cooling system
  • Heating and ventilation
  • Fuel system (carburetor)
  • Injection system «Bosch CIS-E»
  • Injection system «Bosch HFM»
  • Diesel fuel system
  • Supply system
  • Starting and charging system
  • Ignition system (I4)
  • Ignition system (V6)
  • Preheating
  • Transmission
  • Clutch
  • Mechanical gearbox
  • Automatic gearbox
  • Drive shafts
  • Chassis
  • Brake system
  • Car suspension
  • Steering
  • Body
  • Exterior (external elements)
  • Interior (internal elements)
  • Doors, locks and windows
  • Electrical equipment
  • Equipment and devices
  • Switches
  • Headlights and lighting
  • Electrical circuits
W123 (1976-1985) 
  • General information
  • Introduction to the guide
  • Power unit
  • Engine device
  • Repair M102 engines
  • Repair M110 and M123 engines
  • Cooling and lubrication (M102)
  • Cooling (M110 and M123)
  • Ignition system
  • Power system «Stromberg»
  • Power system «Solex 4A1»
  • Fuel injection «K-Jetronic»
  • Fuel injection «L-Jetronic»
  • Transmission
  • Clutch
  • Mechanical gearbox
  • Automatic gearbox
  • Cardan and rear axle
  • Chassis
  • Front suspension
  • Rear suspension
  • Steering
  • Brake system
  • Body
  • Exterior (external elements)
  • Interior (internal elements)
  • Doors, locks and windows
  • Electrical equipment
  • Equipment and devices
  • Power devices
  • Electrical circuits
 
MercedesMan.ru © 2017–2026 · Mobile version · Read about Mercedes · Sitemap: EN BG BY UA RS HR RO PL SK HU · Feedback · Site search · Bookmark A-Class (W168) · C-Class (W201) · C-Class (W202) · C-Class (W203) · E-Class (W123) · E-Class (W124) · E-Class (W210) · G-Class (W463) · M-Class (W163) · S-Class (W116, petrol) · S-Class (W126, petrol) · S-Class (W140) · S-Class (W220) · Sprinter · Vito 1 · Vito 2 · Vario 814D ·
 
We only use cookies without which some of the site's features may not be available.