



Attention! Failed airbag modules must be discharged before disposal - contact a car service specialist for help.
Driver's airbag
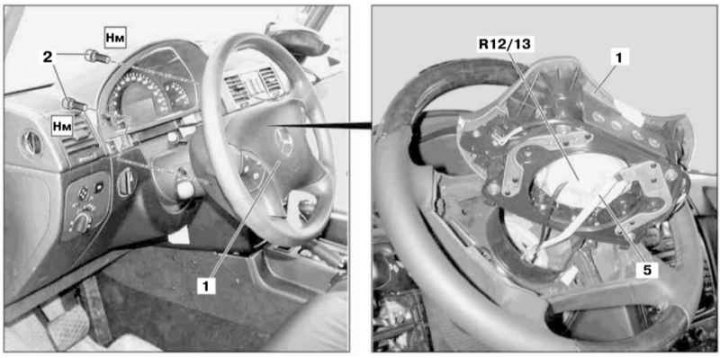
Driver's airbag module installation details for models produced up to 30.06.02
1 - Airbag module; 2 - Bolts; 5 - Steering wheel wiring connector; R12/13 - Igniter
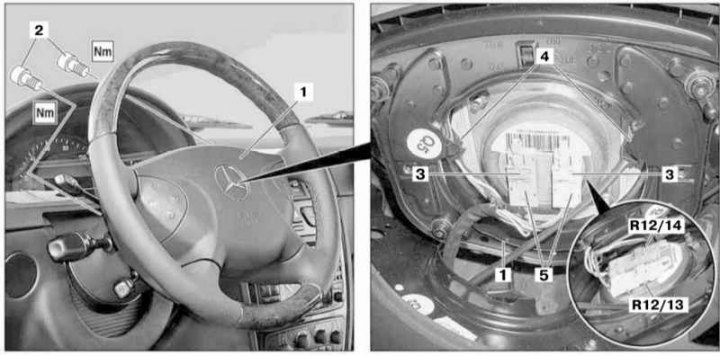
Driver's airbag module installation details for models produced from 01.07.02
1 - Airbag module; 2 - Bolts; 3 - Fixators; 4 - Steering wheel wiring connector; 5 - Contact connector for igniter wiring; R12/13 - Igniter No.1; R12/14 - Igniter No.2
1. Move the steering wheel all the way back.
2. On models with the corresponding configuration (code ET2), activate the service mode of the TELE AID emergency call system (see Section Activation/deactivation of the service mode of the TELE AID emergency call system).
3. Turn on the auxiliary battery and connect it to the standard battery, then disconnect the negative cable from the latter.
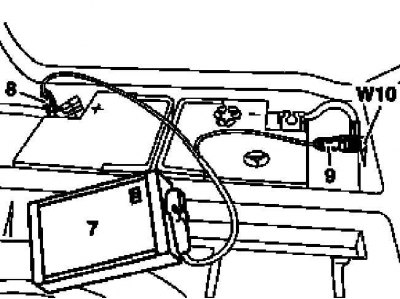
7 - Auxiliary battery
8 — Positive wire terminal of the module
9 — Terminal of the negative wire of the module
W10 - Battery ground
4. Unscrew the mounting bolts (2).
5. On models produced up to 30.06.02, lift the driver's airbag module (1) and disconnect the connector (5) of the multifunction steering wheel (5) wiring harness. Also disconnect the wiring harness from the igniter (R12/13) of the airbag.
6. On models produced from 01.07.02, lift the module (1), release the clamps (3) and disconnect the connectors (5) of both igniters (R12/13 and R12/14), as well as the connector (4) of the multifunction steering wheel.
7. Remove the driver's airbag module (1).
8. Installation is carried out in the reverse order - make sure that the contact connectors are securely fixed.
Note: On models produced from 01.07.02, the mating of the connectors (5) should be accompanied by a distinct click.
9. On models with the corresponding configuration (code ET2), deactivate the service mode of the TELE AID system (see Section Activation/deactivation of the service mode of the TELE AID emergency call system).
10. Finally, read the DTC codes and clear the on-board diagnostic system memory using the STAR DIAGNOSIS scanner (6511 1801 00) (See Chapter Engine electrical systems) and perform basic programming procedures.
Passenger airbag
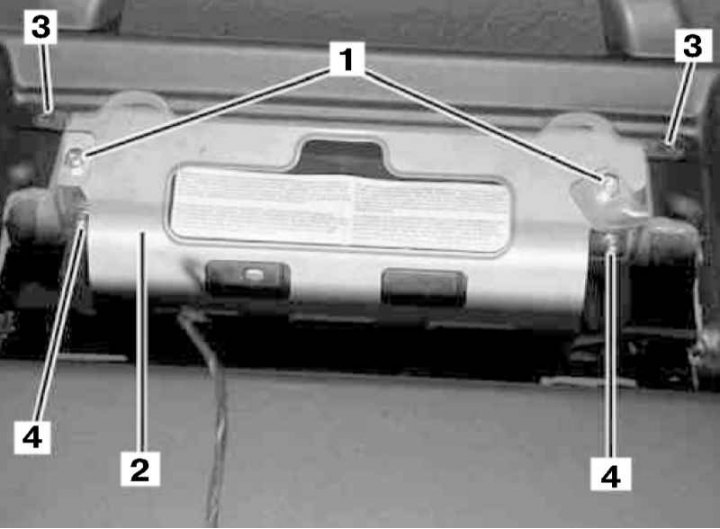
Passenger Front Airbag Module Installation Details
1 - Mounting brackets; 2 - Airbag module; 3, 4 - Screws
1. On models with the corresponding configuration (code ET2), activate the service mode of the TELE AID emergency call system (see Section Activation/deactivation of the service mode of the TELE AID emergency call system).
2. Turn on the auxiliary battery and connect it to the standard battery, then disconnect the negative cable from the latter.
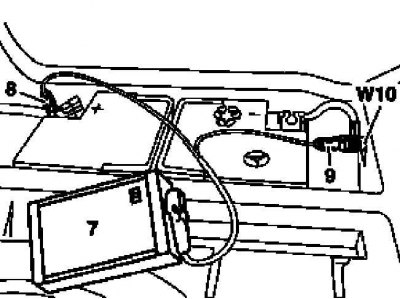
7 - Auxiliary battery
8 — Positive wire terminal of the module
9 — Terminal of the negative wire of the module
W10 - Battery ground
3. Remove the glove box (see Chapter Body).
4. Disconnect the electrical wiring from the gas generator initiator - when connecting, make sure that the connector is securely latched.
5. Loosen the nuts of the mounting bracket fastening screws (1) (two screws for each bracket).
6. Remove the screws (3) securing the handle installed on the instrument panel.
7. Remove the screws (4) securing the passenger airbag module (2) to the instrument panel support bracket.
8. Remove the module (2) together with the support bracket.
9. If necessary, separate the module (2) from the bracket.
10. Installation is carried out in the reverse order - if the corresponding configuration (code ET2) is installed, deactivate the service mode of the TELE AID system (see Section Activation/deactivation of the service mode of the TELE AID emergency call system).
11. Finally, read the DTC codes and clear the on-board diagnostic system memory using the STAR DIAGNOSIS scanner (6511 1801 00) (See Chapter Engine electrical systems) and perform basic programming procedures.