
Salon
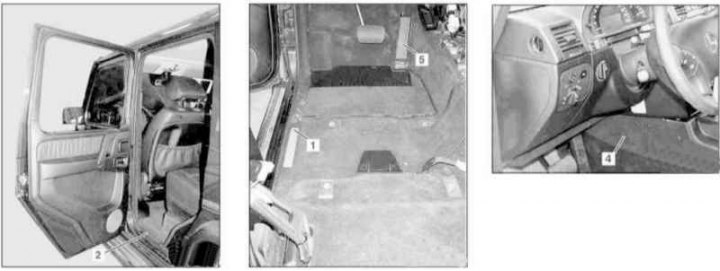
Details of installation of interior carpet panels (left-hand side) (1 of 2)
1, 2 - Thresholds; 4 - Finishing panels of the transmission line tunnel; 5 - Gas pedal
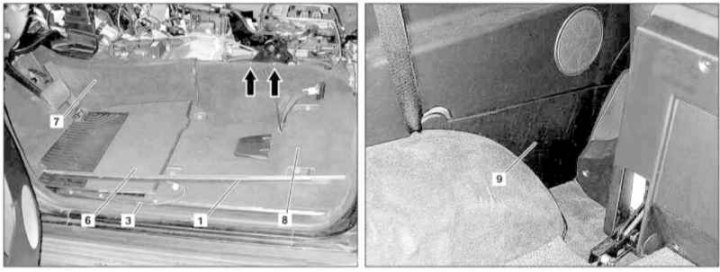
Details of installation of interior carpet panels (left-hand side) (2 of 2)
3 - Wiring connector; 6 - Front carpet panel; 7 - Carpet panel of the tunnel section; 8 - Central carpet panel; 9 - Lower side trim panel
1. Remove the front seat assembly (see Section Removal and installation of front seat assemblies).
2. On models 463.246/249, remove the emergency call system control module console (when working on the passenger side of the car).
3. Prying at several points with a suitable wedge, remove the front and rear door sill trims (1 and 2).
4. Disconnect the connector (3) electrical wiring under the front door sill trim.
5. Turn out three fixing bolts and remove the panel (4) transmission line tunnel finishes.
6. When working on the driver's side of the car, remove the gas pedal assembly (5).
7. Remove the center console assembly (see Section Removal and installation of the center console).
8. Remove B-pillar trim panels (see Section Removal and installation of trim panels body pillars).
9. Remove the side trim panels (see Section Removal and installation of trim panels).
10. Remove the front carpet panel (6) floor coverings.
11. Remove the carpet panel (7) transmission line tunnel cover.
12. Remove the center carpet panel (8), the left side of which is put on the two studs of the parking brake lever support bracket (arrows).
13. Installation is carried out in the reverse order.
Luggage compartment
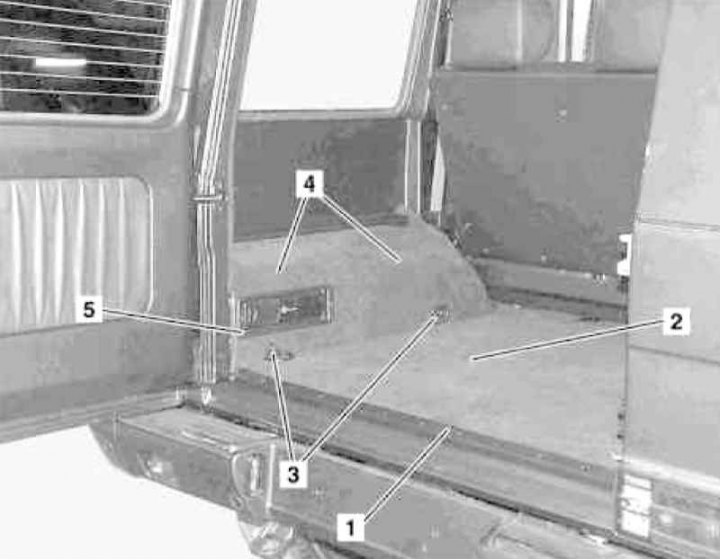
Details of installation of luggage compartment floor carpet panels
1 - Overlay; 2 - Carpet flooring panel; 3 - Mounting eyes; 4 - Wheel arch carpet panel; 5 - Plastic frame for CD changer
1. Remove the rear seats (see Section Removal and installation of rear seat assemblies).
2. Appropriate models (code E66), equipped with a Harman/Kardon audio system, remove the woofer.
3. Remove side trim panels (see Section Removal and installation of trim panels).
4. Remove the battery access cover.
5. Remove the mounting plate (1).
6. Remove the panel (2) carpet flooring.
7. Remove the mounting eyes (2).
8. Remove wheel arch carpet panels (4).
Note. On corresponding models (code EP5) first remove the plastic frame of the CD changer from the left wheel arch (5).
9. Installation is in reverse order - do not forget to lubricate the underside of the panels (2 and 4) at specially provided points with fresh glue.
10. Finally, read the DTCs and clear the OBD memory using the STAR DIAGNOSIS scanner (6511 1801 00) (see chapter Engine Electrical Systems).