
Checking and adjusting the hydraulic steering limiter
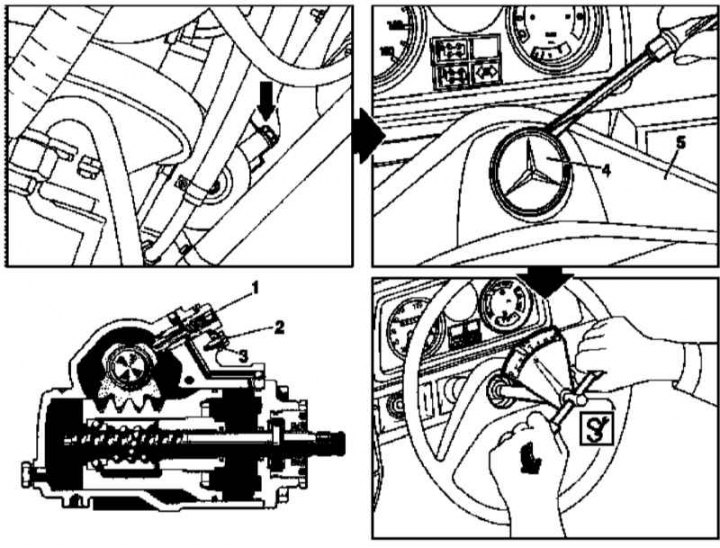
1 - Restrictor valve (arrow); 2 - Hex bolt; 3 - Locking insert; 4 - Cover; 5 - Steering wheel
1. Jack up the front of the car and place it on jack stands.
2. Remove the hex bolt (2) and remove it together with the locking insert (3).
3. Screw in the restrictor valve (arrow) into the steering gear housing until it stops, then release 2-2.5 turns.
Note. There is only one check valve (1), working in both directions of rotation of the steering wheel. Accordingly, the selected valve setting will also act in both directions of rotation.
Attention! Do not loosen the restrictor valve more than 2.5 turns while the engine is running.
4. Remove the airbag module from the steering wheel (see chapter Onboard electrical equipment).
5. With the engine running at 800 rpm, turn the steering wheel all the way to the left.
6. Place a socket wrench on the bolt / nut of the steering shaft, pull it all the way into the steering lock with a force of about 25 Nm and fix it in this position.
7. Slowly screw the pressure reducing valve into the steering gear housing until a resistance of 20 Nm is encountered, ensuring that the required parameters are set.
8. Screw in the locking insert (3) and hex bolt (2).
Note. If the bushing cannot be seated on the hex head of the pressure reducing valve after adjusting the latter, correct the position of the valve by tightening it to the required angle clockwise.
9. Reinstall the driver's airbag module.