
Cars BMW Cars Volkswagen Cars Chevrolet Cars Land Rover Cars Lada Cars Honda Cars Peugeot
English Русский
Български
Беларускі
Український
Српски
Hrvatski
Română
Polski
Slovenský
Magyar
Bookmark News and articles Sitemap Feedback Site search
MercedesMan.ru


A-Class C-Class E-Class G-Class M-Class S-Class Others
W168 (1997-2004)
  • Main
  • A-Class
  • W168 (1997-2004)
  • Power unit
  • Fuel system
  • Fuel pump and fuel gauge sensor

Fuel pump and fuel gauge sensor (Mercedes-Benz A-Class W168)

0
Gasoline-powered vehicles. The electric fuel pump and fuel gauge sensor are located in the fuel tank. To remove them, the fuel tank must be removed.

Diesel-powered vehicles. Since the fuel pump is driven by the camshaft, the fuel tank only contains a fuel gauge sensor.

There should be no fuel in the tank before removing the sensor. This may be due to the entire fuel supply being used, or the fuel may need to be drained into a prepared container.

Be sure to ensure good ventilation of the workplace.

For this purpose, you can use a centrifugal fan, the electric motor of which is located outside the air flow.

Warning! When dismantling the fuel pump, a small amount of fuel may escape. Avoid contact with skin. Fuel vapors are toxic and highly flammable. Avoid open flames. Keep a fire extinguisher handy and ensure that the work area is well ventilated.


Removal


The procedure for removing the fuel gauge sensor is shown using the example of a car with a gasoline engine.

The fuel gauge sensor in vehicles with a diesel engine is removed in an identical manner.

1. Disconnect the ground (-) wire terminal from the negative battery terminal, after turning off the ignition.

Warning! When you disconnect the battery from the radio, the security code is deleted, as well as all automatic settings on the radio station. If the code is unknown or not written down, then the radio can only be put into operation by resorting to the help of a workshop or the manufacturer of the radio. Therefore, make sure in advance that the code is known.


2. Drain the fuel from the tank.

Warning! Jacking up and jacking up a vehicle may present a risk of injury. Read the safety precautions in Chapter "Jacking up a car".


3. Jack up the car and place it on jack stands.

4. Remove the underbody protection.

5. Disconnect the supply and ventilation hoses from the tank filler pipe, having first loosened the fastening clamps and moved the clamps onto the hoses. Plug the supply hose with a suitable plug or clamp it with a clamp.

6. Disconnect hoses 1 from fuel filter 2 and collect the fuel that has leaked out of them (see illustration).
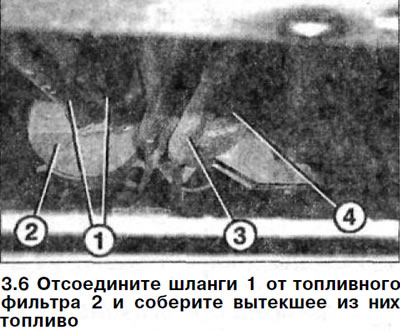
6. Disconnect hoses 1 from fuel filter 2 and collect the fuel that has leaked out of them (see…


7. Disconnect the fuel tank ventilation hose 3 from the adsorber filter 4 (see illustration 3.6).

8. Disconnect the fuel pump power plug.

9. Unscrew the mounting bolts and detach the muffler mounting bracket.

10. Support the fuel tank and unscrew the bolts that secure it to the body.

11. Press down the underbody protection near the exhaust pipes and remove the fuel tank.

12. Remove the plug or clamp from the feed hose and drain the fuel tank completely.

13. Disconnect the fuel and ventilation hoses from the feed pump.

14. Unscrew the six nuts that secure the support ring of the fuel pump and fuel gauge sensor.


15. Carefully remove the fuel pump with the sensor from the fuel tank.

The fuel pump and fuel gauge sensor are installed in the reverse order of their removal.

16. Replace the sealing gasket if damaged.

The correct installation position of the fuel pump and/or fuel gauge sensor is ensured by fixing them.

17. Be sure to replace the fuel tank mounting nuts with new ones.

Tightening torques for threaded connections:
  • fuel tank to body - 30 Nm
This article is available at: russian, bulgarian, belarusian, ukrainian, serbian, croatian, romanian, polish, slovak, hungarian
The article has been verified: Lukyanov Nikita Ilyich
Share with friends:
◀ Previous
A-Class W168 / Fuel system
Next ▶

Fuel System — Pressure Relief
General description of the fuel system
Fuel injection pump — removal and installation
Fuel Shut-Off Solenoid Valve — Removal and Installation
Air filter — removal and installation
Accelerator pedal stop — adjustment
Intake manifold — removal and installation
More similar articles for repairing other models

☛ Fuel Level Gauge Sensor Unit — Removal and Installation Mercedes 190 (W201) (1982-1993)
☛ Removal and installation the fuel pump Mercedes W123 (1976-1985)
☛ Removal and installation the fuel pump Mercedes W463 (1999-2019)
☛ Removal and installation the fuel pump assembly with fuel level sensor Mercedes W163 (1997-2005)
☛ Removal and installation the high pressure fuel pump (OM603) Mercedes W140 (1991-1998)
☛ Removal and installation of fuel injection pump Mercedes Sprinter (1995-2000, diesel)
Link in different formats to this article
Comments and feedback from visitors
No comments yet


How much will 21 + 39 ?


W168 (1997-2004) 
  • General information
  • User manual
  • Maintenance
  • Troubleshooting
  • Power unit
  • Engine repair
  • Cooling and heating
  • Injection system (gasoline)
  • Fuel system (diesel)
  • Fuel system
  • Exhaust system
  • Ignition system
  • Transmission
  • Clutch
  • Transmission
  • Chassis
  • Brake system
  • Suspension
  • Steering
  • Body
  • Interior (all models)
  • Interior (since 1997)
  • Interior (since 2001)
  • Exterior
  • Doors and windows
  • Electrical equipment
  • Equipment and devices
  • Power devices
  • Windshield wipers and washers
  • Headlights and lighting
  • Electrical circuits
 
MercedesMan.ru © 2017–2026 · Mobile version · Read about Mercedes · Sitemap: EN BG BY UA RS HR RO PL SK HU · Feedback · Site search · Bookmark A-Class (W168) · C-Class (W201) · C-Class (W202) · C-Class (W203) · E-Class (W123) · E-Class (W124) · E-Class (W210) · G-Class (W463) · M-Class (W163) · S-Class (W116, petrol) · S-Class (W126, petrol) · S-Class (W140) · S-Class (W220) · Sprinter · Vito 1 · Vito 2 · Vario 814D ·
 
We only use cookies without which some of the site's features may not be available.