
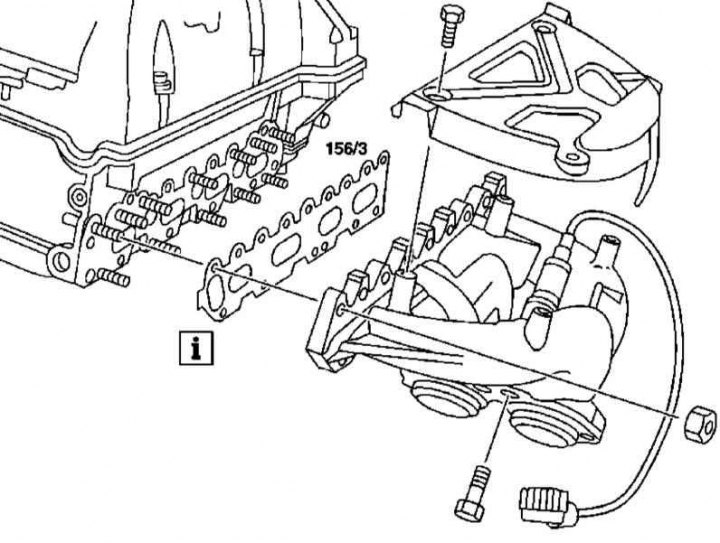
111 Series Engine Exhaust Manifold Installation Details
1. Installation details of the exhaust manifold of the 111 series engine are shown in the illustration, to which all references in the text refer.
2. Remove the lambda probe.
3. Turn out fixing nuts and remove a final collector.
4. Remove the exhaust manifold gasket (156/3).
5. Remove the exhaust manifold support bracket.
111 Series Engine Exhaust Manifold Support Bracket Location
6. Check up a condition of fixing nuts, in case of need make replacement.
7. Thoroughly clean the mating surfaces of the manifold and cylinder block.
8. Install in reverse order - temporary fixation of the NEW gasket can be secured with a few strokes of sealant.
M112/113
1. Details of the installation of the exhaust manifolds of engines of the 112 and 113 series are shown in the illustrations, which include all references in the text.

112 and 113 Series Left Exhaust Manifold Installation Details

112 and 113 Series Right Exhaust Manifold Installation Details
2. Remove the front wheels.
3. Remove the lockers and deflectors protecting the wheel arches.
4. Turn out bolts (11/1) attachment to the exhaust manifold of the exhaust pipe of the exhaust system.
5. Release fasteners fixing the downpipe to the support bracket on the transmission case.
6. Give fixing nuts (156/1) and remove the exhaust manifold (156).
Attention! The exhaust manifold mounting nuts must be replaced without fail!
7. Thoroughly clean the mating surfaces of the manifold and cylinder block.
8. Installation is in reverse order - do not forget to replace the seal (156/5).