
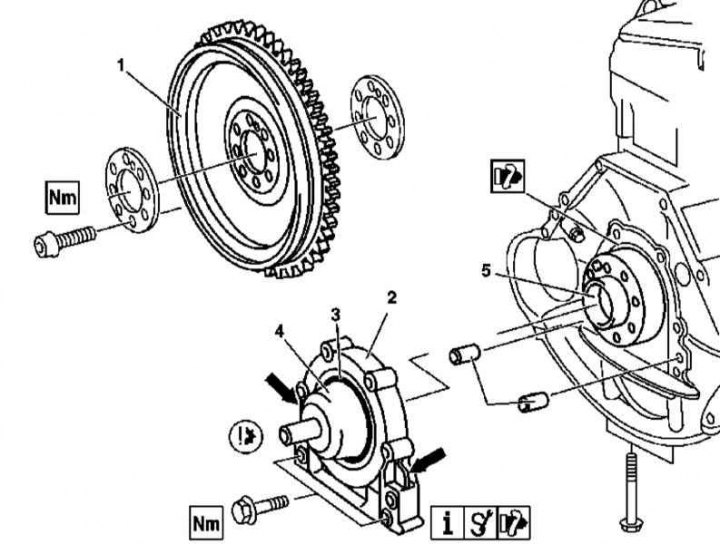
612 Series Rear End Cap/Crankshaft Seal Installation Parts
1. Installation details of the rear end cover / rear crankshaft oil seal on 612 series engines are shown in the illustration, to which all references in the text refer.
2. Remove flywheel/drive plate (1) (see Section Removal and installation of a flywheel/drive disk).
3. Turn out fixing bolts and remove an end cover (2) assembled with the crankshaft rear oil seal, - pry off the cover in the places indicated by the arrows, try not to damage the sealing gasket of the oil pan.
4. Drain the engine oil.
5. Loosen the sump mounting bolts and drain the remaining oil from the sump.
6. Thoroughly clean the mating surfaces.
7. Replace the cover with the stuffing box pressed into it.
Note. If the gland (3) damaged, cover must be replaced.
8. Install the crankshaft rear O-ring (5) (assembly sleeve (4)).
9. Install flywheel/drive plate.
10. Tighten the pan mounting bolts.
11. Fill the engine with fresh oil.
12. Start the engine and check it for signs of leak development.
M628
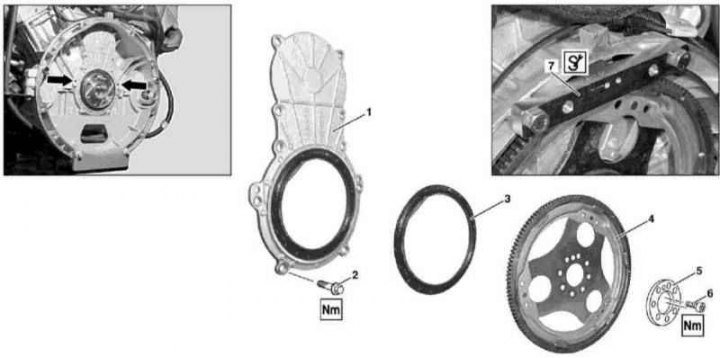
628 Series Rear End Cap/Crankshaft Seal Installation Parts
1 - End cap; 2 - Bolts; 3 - Crankshaft seal; 4 - Drive disk; 5 - Washer; 6 - Bolt; 7 - Blocker
1. Installation details of the rear end cover / rear crankshaft oil seal on 628 series engines are shown in the illustration, to which all references in the text refer.
2. Remove transmission (see chapter automatic transmission).
3. Using a special tool (7) block the gear ring of the drive disk.
4. Turn out fixing bolts (6) and remove the drive disk (4) (see Section Removal and installation of a flywheel/drive disk).
5. Drain the engine oil (see chapter Changing the engine oil and oil filter).
6. Turn out bolts (2) and remove the end cap (1), gently prying it with a flat-bladed screwdriver in the area where the guide bushings are installed.
7. Remove the old oil seal (3)
8. Thoroughly clean the mating surfaces and, having seated on the sealant, install the cover in place.
9. Install a new oil seal (3).
10. Reinstall the removed components in reverse order of removal.
11. Start the engine and check it for signs of leak development.