
Removing
This chapter explains how to remove and install the instrument panel, various switches, and the car radio including speakers and antenna.
1. Disconnect the wire terminal «masses» (-) from the battery terminal. The ignition must then be switched off.
Attention! When the battery is disconnected from the radio, the security code is deleted, as well as all automatic settings on the radio. If the code is unknown or not written down, the only way to put the radio into operation is with the assistance of a workshop or the manufacturer of the radio. Therefore, first make sure that the code is known.
Vehicles manufactured before 2101
2. Unscrew the two screws 1 that secure the deflector trim on the driver's side, and remove the trim (see illustration).
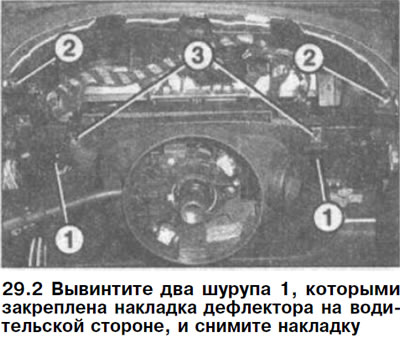
Attention! The illustration shows the instrument panel with trim removed.
3. Unscrew the two screws 2 with multi-faceted socket heads and remove the upper trim of the instrument panel (see illustration 29.2).
4. Unscrew the two screws 3 with multi-faceted socket heads that secure the instrument panel (see illustration 29.2).
5. Submit the instrument panel into the passenger compartment, release and disconnect the plugs on its back and remove the panel.
Vehicles manufactured since 3/01
Depending on the model, two special removable brackets are required to remove the instrument panel, with which the instrument panel trim is removed. These clips, article number 140 589 02 33 00, are threaded to a depth of approx. 35 mm into both slots on the right and left sides of the instrument panel trim.
After that, the staples should be rotated 90°and carefully pushed towards themselves so that they go into the recesses on the back of the lining. After that, pull both brackets at the same time and remove the trim.
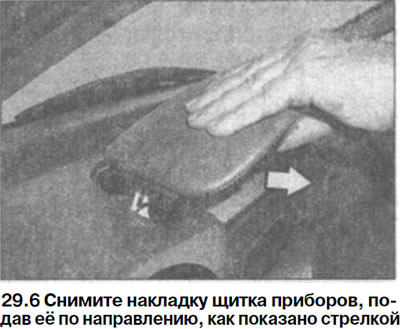
6. Remove an overlay of a guard of devices, having given it in the direction, as it is shown by an arrow on an illustration.
7. Remove the temperature sensor 1 from the seat on the instrument panel (see illustration).
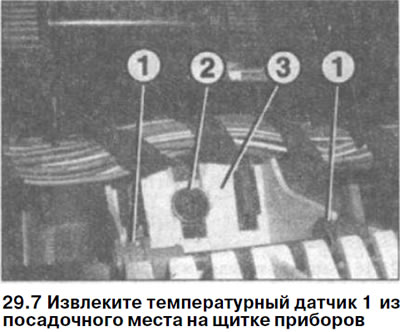
8. Unscrew the bolt 2, press the clamp 3 and raise the instrument panel (see illustration 29.7).
9. Unlock the plugs on the back side of the instrument panel by pressing the bracket and disconnect the plugs.
10. Remove the instrument panel.
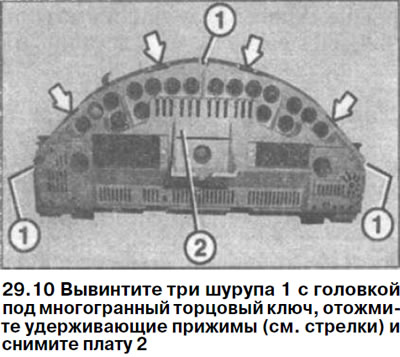
If the electronic board will be removed from the shield housing, then for this it is necessary to unscrew three screws 1 with a head for a multi-faceted socket wrench, press the holding clamps (see arrows in illustration) and remove payment 2.
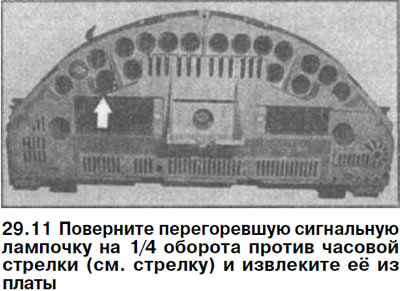
11. Turn the burned out warning light 1/4 turn counterclockwise (see arrow in illustration) and remove it from the board.
Installation
12. Install the electronic board in the body of the shield, if it was removed, and fix it. Make sure that the glass on the shield body is not dirty from the inside.
13. Secure the board to the shield with three socket head cap screws.
14. Insert the new bulb and secure it in place by turning it 1/4 turn clockwise.
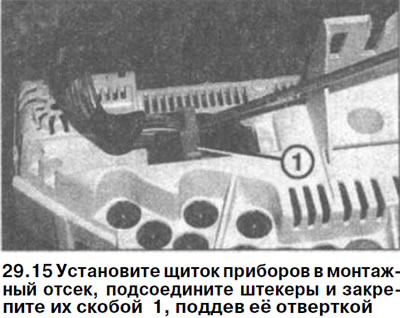
15. Install the instrument panel in the mounting compartment, connect the plugs and secure them with bracket 1 by prying it with a screwdriver (see illustration).
16. Cars manufactured before 2/01. Secure the instrument panel with two socket head cap screws.
17. Vehicles manufactured since 3/01. Secure the instrument panel to the mounting compartment with one screw.
18. Vehicles manufactured since 3/01. Replace the temperature sensor.
19. Cars manufactured before 2/01. Replace the top trim 1 of the shield and secure it with two multi-faced socket head cap screws (see illustration).
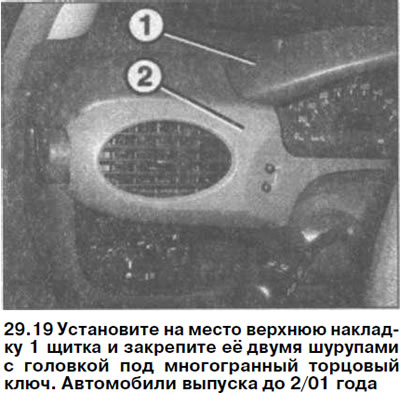
20. Cars manufactured before 2/01. Reinstall trim 2 of the instrument panel and secure with two screws (see illustration 29.19).
21. Vehicles manufactured since 3/01. Install the instrument panel top trim and secure it.
22. Connect the wire terminal to the battery «masses» (-), before making sure that the ignition is off.
23. Enter the security code into the radio and set the clock.