
1. Check the fuse first if the heater is not working.
2. Remove facing and check landing of plugs of food supply to a heater of back glass if the fuse is in order. If necessary, clean the plugs and remove corrosion from the contacts.
If the heater still does not work, then check the condition of the power wires and the switch, as well as the switch and relay.
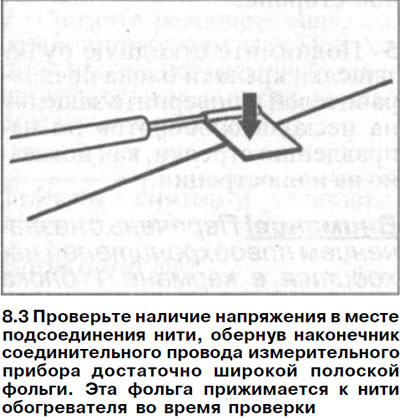
3. Check the condition of the heater filaments. To do this, check for voltage at the thread connection by wrapping the tip of the connecting wire of the measuring device with a sufficiently wide strip of foil. This foil is pressed against the heater filament during the test (see arrow in illustration).
4. Start the engine and turn on the rear window defroster.
5. Measure the tension by pressing the foil down the center of each strand. If the voltage on the threads is approximately 6 V, then the threads are in order. If the voltage is within 10V or absent, then there is a break in the thread.
If the heating filaments are broken, they can be restored using a conductive silver-based varnish, which is commercially available. Before applying varnish, clean the damaged area.
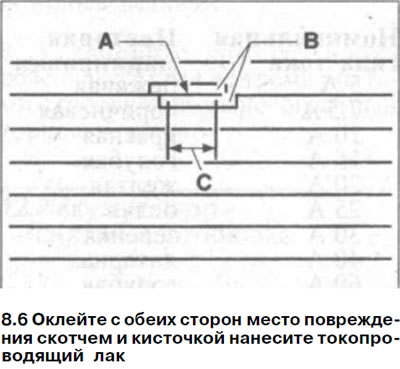
6. Tape both sides of the damaged area A with adhesive tape B and a brush Apply conductive varnish C (see illustration).
7. Let the varnish dry for 24 hours at +25°C. If necessary, you can use a hairdryer. At a temperature of +150°C, the varnish dries in 30 minutes.
Attention! Do not turn on the rear window defroster until the varnish is dry. Do not use gasoline or other solvents on damaged thread.