
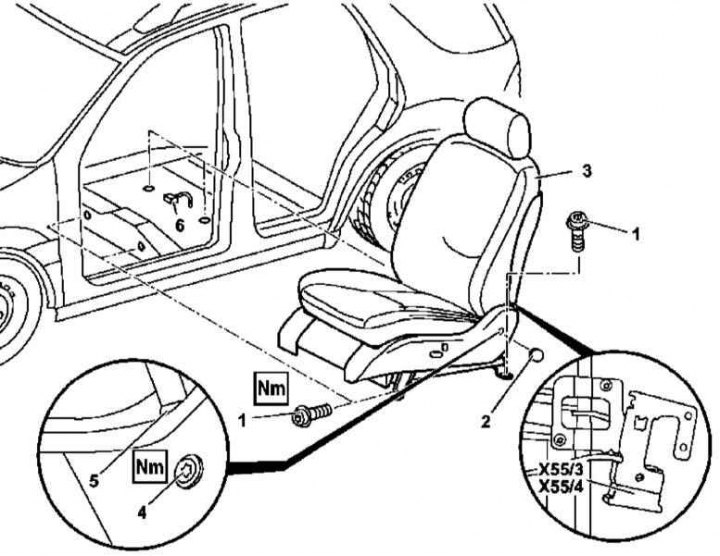
Front seat installation details (using the power driver's seat as an example)
X55 / 3 - Contact node of the left front seat
X55 / 4 - Contact node of the right front seat
1. Details of the front seat installation are shown in the illustration, to which all references in the text refer.
2. Remove the seat headrest (see chapter Controls and techniques for safe operation).
3. Bring the seat to a comfortable position, allowing access to the plug (2) position, remove the plug and remove the screw (4) anchor assembly fastening (5) seat belt.
4. Remove the front screws (1) fastening of the console assembly of the front seat (3).
5. Move the seat (3) all the way forward.
6. Remove rear screws (1) fastening of the console assembly of the front seat (3).
7. Disconnect the wiring connector (6) contact node (X55/3 or X55/4) corresponding seat.
8. Remove the seat (3) and remove it from the passenger compartment - try not to damage the paintwork of the body elements.
9. Installation is carried out in the reverse order - replace the fasteners, lubricate the threads of the bolts with a special sealant to fix the threaded connections before installation.