



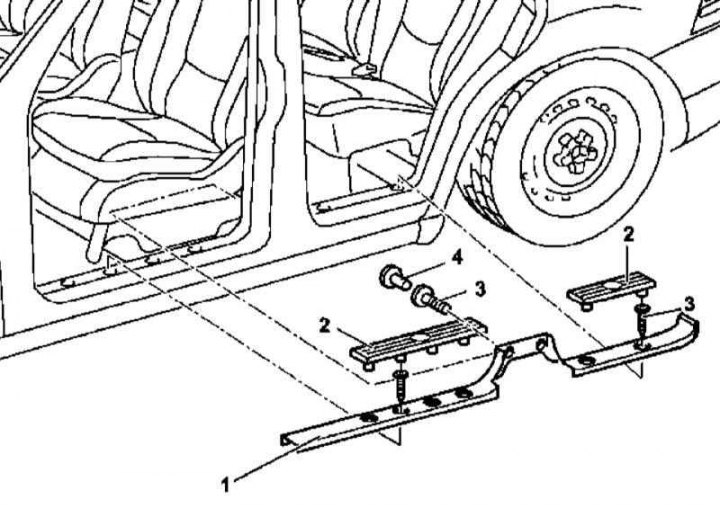
Installation details of side door sill trims
1. The details of installing the side door sill trims are shown in the illustration, to which all references in the text refer.
2. Remove the covers (2) from the door sill trim (1).
Note: On models produced before 08.99, release the latches moving from the center of the cover to its edges, on models produced since 09.99, start from the front end of the cover and move back.
3. Remove the screws (3) securing the trim to the door sill.
4. Remove the plugs (4) and unscrew the screws (3) securing the trim to the B-pillar.
5. On models produced up to 08.99, remove the rear trim mounting pin (1).
6. Push forward, separate the trim (1) from the C-pillar and remove it from the vehicle.
7. Installation is carried out in the reverse order - if necessary, slightly bend the finishing panel of the rack using a suitable wedge to ensure adequate space for the fit of the cover plate (1).
Side doors
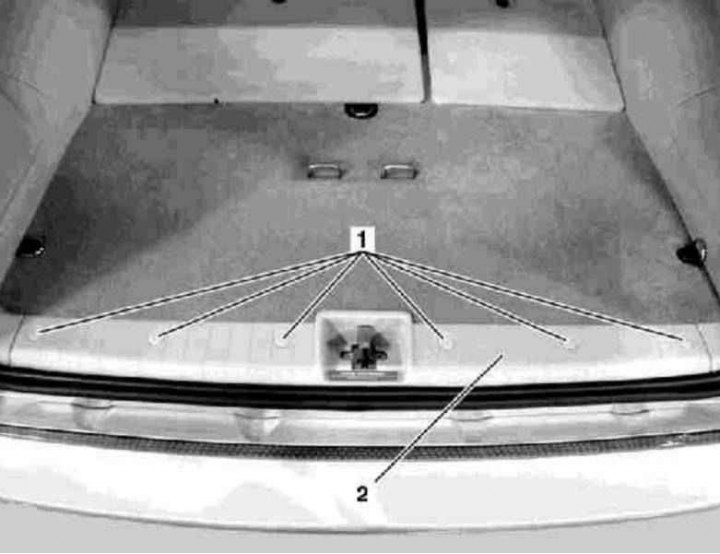
Rear door sill trim installation details
1. The details of installing the tailgate sill trim are shown in the illustration, to which all references in the text refer.
2. Remove the plugs (1) - try not to scratch the trim - and unscrew the trim mounting screws (2) located underneath them.
3. Remove the cover (2), - on models equipped with a trip computer, disconnect the contact connector of the on-board compass wiring.
4. Installation is carried out in the reverse order - make sure that the rubber seal is seated correctly.