
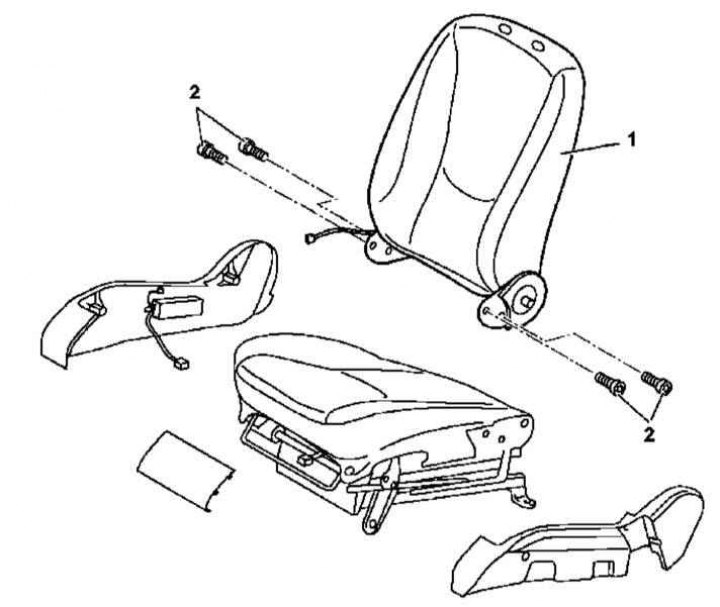
Front seat back installation details (models with electric front seats and without position memory)

Front seat back installation details (models with electric front seats and memory function)
1. The details of installing the front seat back are shown in the illustrations, which include all references in the text.
2. Remove the seat assembly (see Section Removal and installation of carpet floor panels).
3. Remove the side panels of the frame trim and - if equipped - disconnect the electrical wiring connectors of the thermoelectric heating element (3) and adjustment control module (N32/1 or N32/2) (4).
4. Remove the screws (2) backrest fixings (1) and remove the latter from the seat assembly.
5. Installation is carried out in the reverse order - follow the correct wiring.
Rear seat Release models through 08/31/99
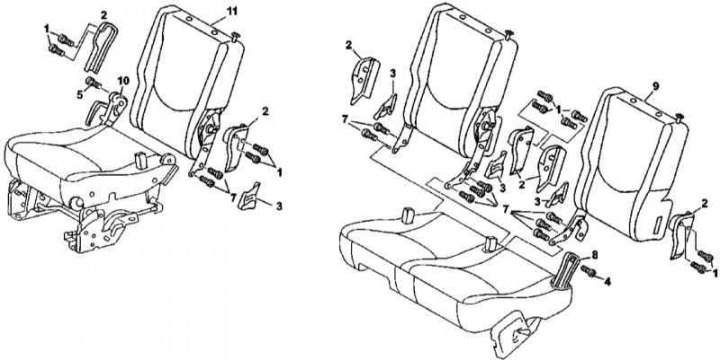
Details of installation of the two-section rear seat backrests on models from 08/31/99
1. Details of the rear seat backrest installation on models manufactured before 08/31/99 are shown in the illustration, to which all references in the text refer.
2. Loosen the seat cover to access the back support pads (2 and 3).
3. Remove the screws (1) top trim attachments (2).
4. Prying off, remove the bottom pads (3).
5. Remove the screws (4 and 5) fastening left (9) and right (11) rear seat backs to their supports (8 and 10).
6. Remove the screws securing the seat belt buckles and release the anchor points of the belts just enough to allow access to the screws (7) back brackets.
7. Remove the screws (7) and remove the backs.
Note. When removing the left and right backrests, pull out their side supports.
8. Install in reverse order
Release models from 09/01/99
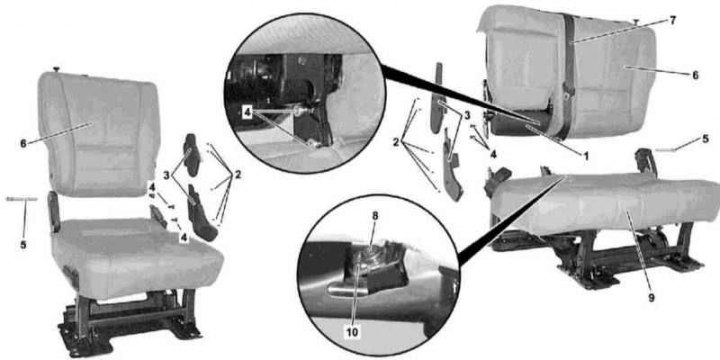
Details of installation of the two-section rear seat backrests on models from 08/31/99
1. Details of the installation of the rear seat backs on models manufactured from 09/01/99 are shown in the illustration, which includes all references in the text.
2. Remove the luggage compartment floor covers.
3. Lower the seat section that cannot be disassembled into the footwell.
4. When disassembling the double section, unscrew the two fixing bolts, bend the upholstery, release the rear latches and remove the pillow installed under the armrest (1).
5. Turn out fixing bolts (2) and remove the side panels (3) back supports.
6. Turn out bolts (4) of the backrest support bracket, when disassembling the two-seat section, first lower the backrest to gain access to the screws on the inside of the bracket.
7. Lower the serviceable backrest section into the footwell.
8. Push the knob forward and remove the screw (5) fastening the back to the outer support.
9. On the two-seat section, remove the upholstery from the back of the cushion (9), pull up the upholstery and remove the screw (8) anchor assembly fastening (10) seat belt (7) to the seat frame. With appropriate equipment (rear side airbags) remove from the seat frame and release the electrical wiring connector from the holder, then remove the seat belt buckle,
10. Remove the back (6).
11. Installation is carried out in the reverse order.