
Outside air temperature sensor installation details
Outside air temperature sensor installation details
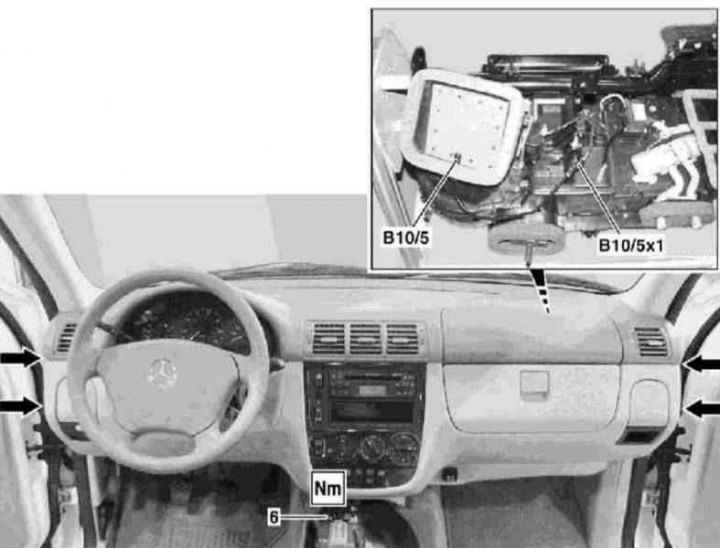
Arrows — Screws of fastening of the panel of devices to racks And
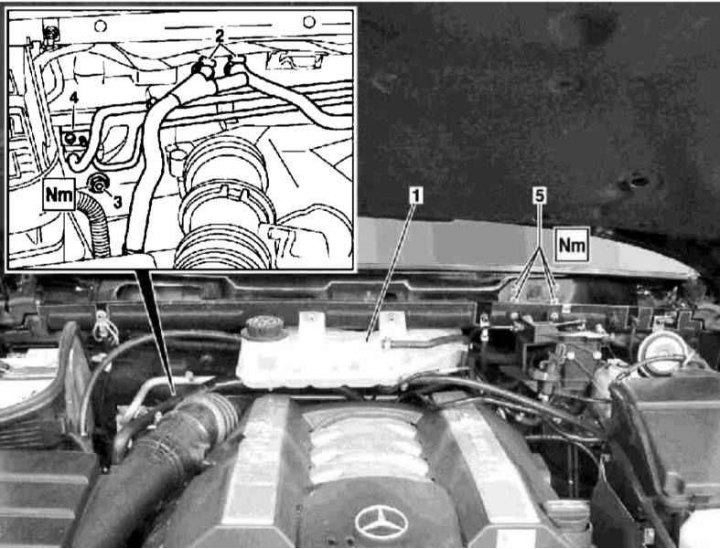
1. Details of the installation of the outdoor temperature sensor are shown in the illustrations, which include all references in the text.
2. Empty the cooling system (see chapter Checking the cooling system and frost resistance of the coolant, changing the fluid).
3. Remove the mounting bolts and remove the expansion tank of the cooling system from the rear bulkhead of the engine compartment (1).
4. Disconnect the coolant hoses (2) from the heater heat exchanger.
5. Discharge the air conditioning system in a car service workshop.
6. Remove the expansion valve cap (4).
7. Give the nut (3) expansion valve mounting (4).
8. Disconnect the refrigeration lines from the expansion valve.
9. Remove the wiper drive assembly.
10. Give nuts (5) instrument panel on the bulkhead of the engine compartment.
11. Remove the A-pillar trim panels.
12. Give plastic nuts of the panel of fastening of the panel of furnish located at the left under the instrument panel.
13. Remove the footwell trim panel.
14. Remove the rubber plugs and unscrew the screws securing the instrument panel to the racks A (arrows).
15. Remove the center console assembly (see chapter Body).
16. Turn out a bolt (6) under the instrument panel.
17. Pull the instrument panel back and turn in such a way that access to its rear side is opened.
18. Disconnect the wiring connector (B10/5x1) outdoor temperature sensor.
19. Disconnect the cable from the sensor to the air conditioner evaporator/heater heat exchanger housing.
20. Remove the outdoor temperature sensor (B10/5) from the air sleeve.
21. Installation is carried out in the reverse order - refueling of the air conditioning system should be carried out in a car service workshop.
22. Finally, check the cooling system for signs of leaks.