
Attention! The standard jack is intended only for short-term lifting of the car when changing a wheel; before performing any work under the car, it must be installed on special supports!
1. Park the vehicle on a level, level surface, if possible paved.
2. Firmly apply the parking brake.
3. Move the AT selector lever to position «R».
4. Set up a warning triangle if necessary.
5. Chock the wheel diagonally opposite the wheel to be replaced.
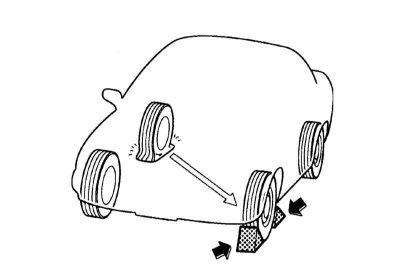
Note. When performing the procedure on a slope, place shoes under both wheels of a working axle on the side of the descent.
6. Prepare the necessary tool (jack, wheel wrench) and a spare wheel.
7. If equipped, remove the protective cap of the disc, then loosen the bolts of the failed wheel.
8. Prepare the regular hydraulic jack for work: assemble the three-section handle and connect it to the hydraulic pump drive of the jack assembly. Check the tightness of the drain plug (2), - if necessary, tighten the plug with a square wrench (1) at the end of the handle.
 | 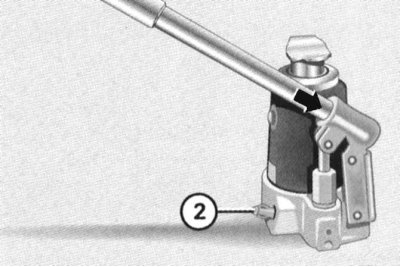 |
Attention! Unscrewing the screw plug completely involves the risk of loss of hydraulic fluid!
9. Place the head of the jack under the corresponding platform of the front or rear axle housing, - make sure that the jack is located strictly vertically, and its heel rests on the ground with its entire surface, - in case of loose soil, place a suitable lining under the heel (in winter it is useful to have a piece of a wide board in the car).
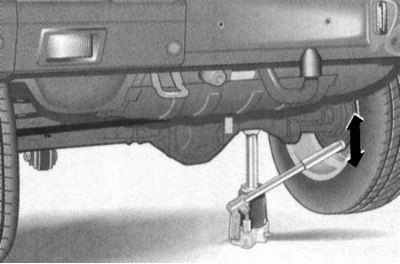
Attention! Remember that regardless of the presence of a slope, the jack must always occupy a strictly vertical position!
10. Using the hydraulic pump drive handle, raise the car with a jack - the damaged wheel should be completely off the ground.
11. Turn out wheel bolts and make replacement of a wheel.
12. Check the inflation pressure of the installed spare tire, if necessary, make the appropriate adjustment (see Specifications).
Note. The maximum allowable continuous operation of the electric tire inflator is 8 minutes.
13. Loosen the jack drain plug and fully sink the jack piston into the cylinder.
14. Put the removed wheel and tool back into place.
15. Finally, tighten the wheel bolts evenly in a diagonal pattern to the required torque (130 Nm).
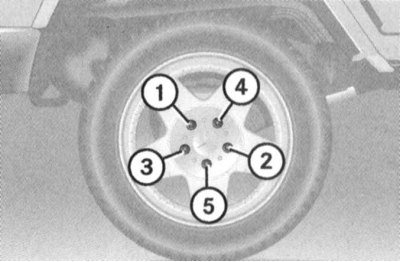
Attention! Only branded bolts with the Mercedes-Benz logo must be used to fasten the wheels!