



- two centering bolts, which can be made independently according to the dimensions shown in the figure;
- special pliers or similar tool.
Necessary quickly expendable materials:
- antifriction paste Mercedes-Benz 001 989 1451 or similar.
1. Open the hatch 3/4 of the way.
2. Unhook the sliding roof panel trim from the spring clips at the front.
3. Open the hatch fully.
4. Remove the hatch trim upwards.
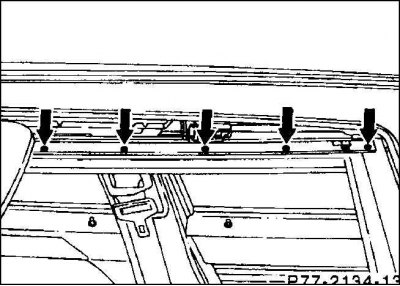
5. Remove the Phillips head screws (arrows) and remove the guide bar.
6. Close the hatch.
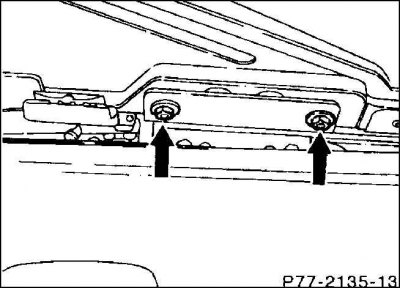
7. Unscrew the nuts (arrows) on the left and right.
8. Pull the hatch upward.
9. Blow compressed air through the drain from top to left and from right to top.
10. Check the floating pads for damage and replace them if necessary.
11. Clean the floating pads and lubricate them with antifriction paste.
12. Clean the guide strips, lubricate the work surface.

13. Insert the centering bolts (arrow) on the left and right into the centering hole.
14. Insert the hatch from above. Put on the nuts, but do not tighten them too tightly.
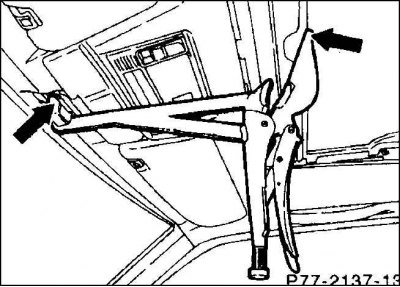
15. Using the special pliers shown in the figure, first clamp the hatch and then tighten the nuts tightly.
16. Open the hatch.
17. Screw the guide bar.
18. Insert and secure the hatch trim with spring clips.