
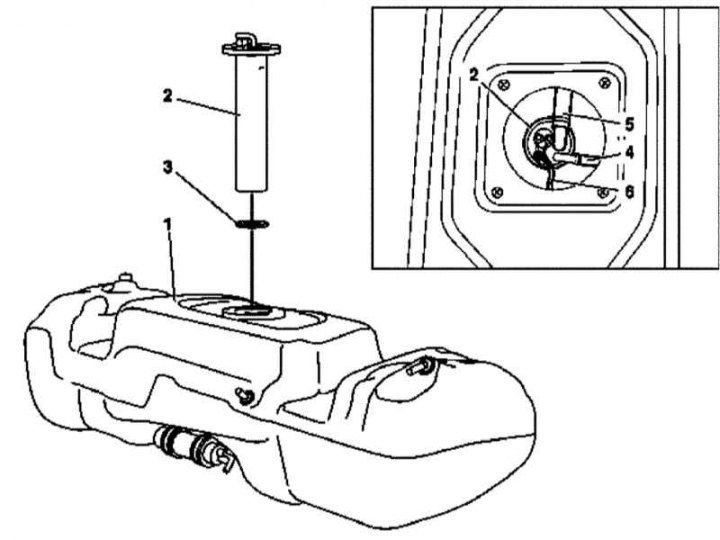
Fuel gauge installation details (all models)
1 - Fuel tank; 2 - Fuel reserve sensor; 3 - O-ring; 4 - Suction fuel line; 5 - Ventilation hose; 6 - Wiring connectors
1. On models of the corresponding configuration (code ET2) activate the service mode of the TELE AID emergency call system (see Section Activation / deactivation of the service mode of the TELE AID emergency call system).
2. Turn on the auxiliary battery and connect it to the standard battery, then disconnect the negative cable from the latter.
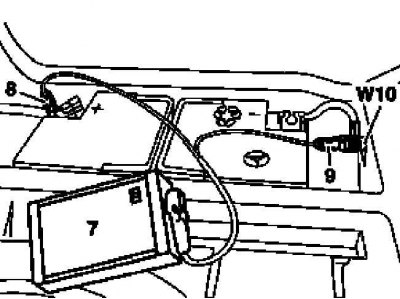
7 - Auxiliary battery
8 - Module positive wire terminal
9 - Terminal of the negative wire of the module
W10 - Battery Ground
3. If the fuel tank (1) full, pump out about 8 liters of fuel from it (see Section Emptying the fuel tank).
4. Remove the carpeting panel in the luggage compartment of the car.
5. Unscrew the cover of the fuel gauge (2).
6. Disconnect from sensor (2) suction fuel line (4) and ventilation hose (5), - plug the open ends of the fittings.
7. Disconnect the wiring (6) and remove the sensor assembly (2) from the fuel tank.
8. Installation is carried out in the reverse order.
9. Finally, deactivate the service mode of the TELE AID system (see Section Activation / deactivation of the service mode of the TELE AID emergency call system) and clear the memory of the processor of the on-board self-diagnosis system (see chapter Engine Electrical Systems).