
Attention! All self-locking fasteners must be replaced without fail!
Except models 463.333
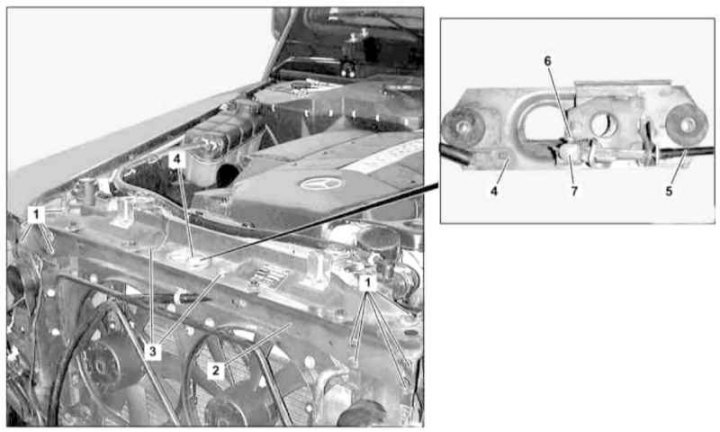
Bonnet lock installation details (except models 463.333)
1, 3 - Bolts; 2 - Upper transverse beam of the ancestor; 4 - Castle; 5 - Drive cable; 6 - Adjusting screw; 7 - Threaded nipple
1. Remove the front grill (see Section Removal and installation of a forward lattice).
2. Remove the bolts (1) in the upper transverse beam (2), - slightly tilt the beam back to provide better access to the nuts from its underside.
3. Detach from beam (2) ground bus.
4. By releasing the cable lock, the lock latch release drive (5), remove the beam (2).
5. Loosen the adjusting screw (6) and by pulling, disconnect the cable (5) from lock assembly (4).
6. Loosen the screws (3) and remove the lock (4).
7. Installation is made upside-down, in case of need replace washers. Make sure that the threaded nipple (7) cable (5) provided a minimum free play of the hood.
Models 463.333
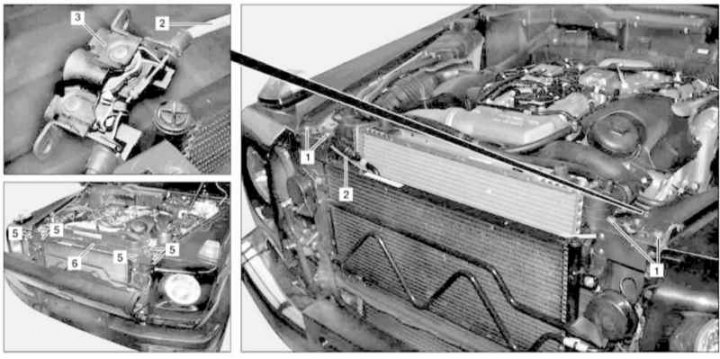
Bonnet lock installation details (models 463.333)
1, 5 - Bolts; 2 - Drive cable; 3 - Castle; 6 - Upper transverse beam of the ancestor
1. Remove the front grill (see Section Removal and installation of a forward lattice).
2. Remove the bolts (5) in the upper transverse beam (6) and remove the latter by releasing the cable from the retainer.
3. Turn out bolts (1), - if necessary, prepare replacement washers.
4. Disconnect the drive cable (2) and remove the lock (3).
5. Installation is carried out in the reverse order - make sure that the marking in the form of an arrow on the lock assembly is turned to the left. Connect the cable to the lock only after installing the latter.