
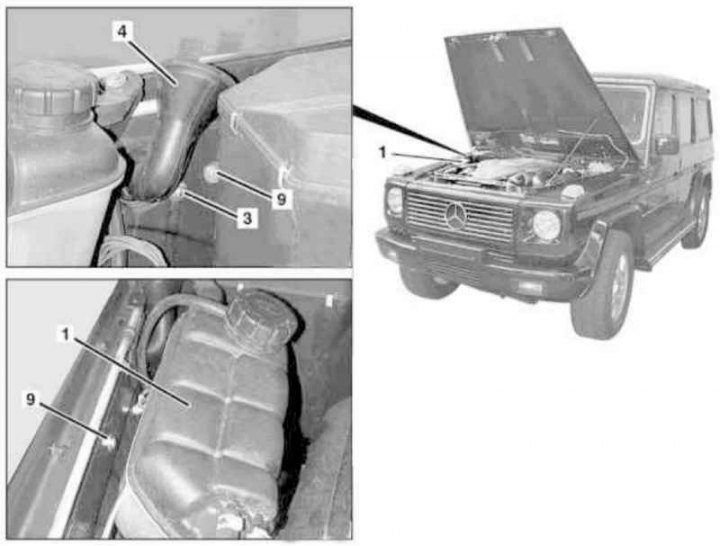
Washer fluid reservoir installation details (except models 463.323) (1 of 2)
1 - Expansion tank of the cooling system; 3 - Nut; 4 - Filler neck; 9 - Mounting bolts
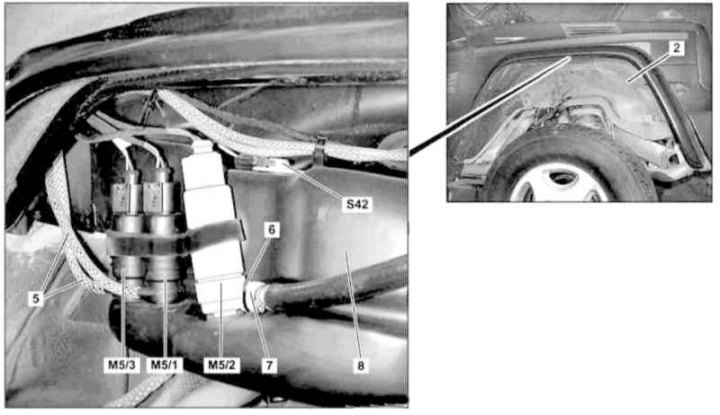
Washer fluid reservoir installation details (except models 463.323) (2 of 2)
2 - Locker; 5, 7 - Hoses; 6 - Clamp; 8 - washer fluid reservoir; M5 / 1 - Windshield washer pump; M5 / 2 - Headlight washer pump; M5 / 3 - Rear window washer pump; S42 - Washer fluid level switch
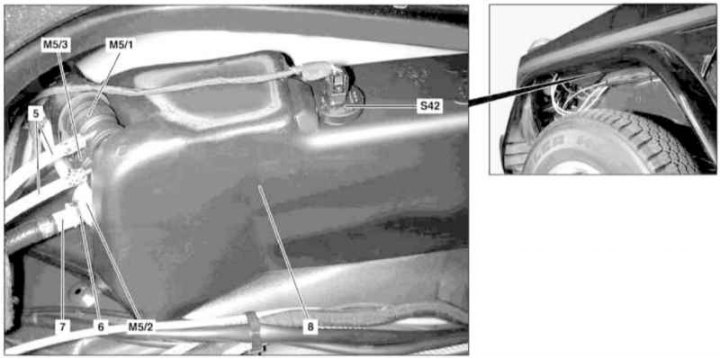
Washer fluid reservoir installation details (models 463.323)
1. Remove expansion tank (except models 463.323), - on models 463.323 the tank is placed in the left part of the engine compartment.
2. Remove the locker (2) protecting the corresponding wheel arch (see Section Removal and installation of wheel arch protection lockers).
3. Remove the air path resonator chamber with water collector (see chapter Power supply and exhaust systems) and, without disconnecting the drain hoses, slide the assembly to the side (except models 463.323).
4. Give the nut (3) bolts (9), disconnect the electrical wiring connectors of the pumps (M5/1, M5/2 and M5/3) and washer fluid level sensor (S42), release the hose tie (5) and remove the tank (8).
5. Drain the rest of the fluid from the reservoir into the prepared container, then disconnect the suction hoses of the pumps, having previously marked them to ensure correct connection during assembly.
Note. To disconnect the hose (7) headlight washer pump (М5/2) release the clamp (6).
6. Installation is carried out in the reverse order - make sure that the sealing ring of the filler neck is seated correctly (4).
7. Finally, fill the reservoir with washer fluid and check that it is properly supplied to the respective washer nozzles.